Creamy Pumpkin Pudding Cups (Quick & Delicious!)
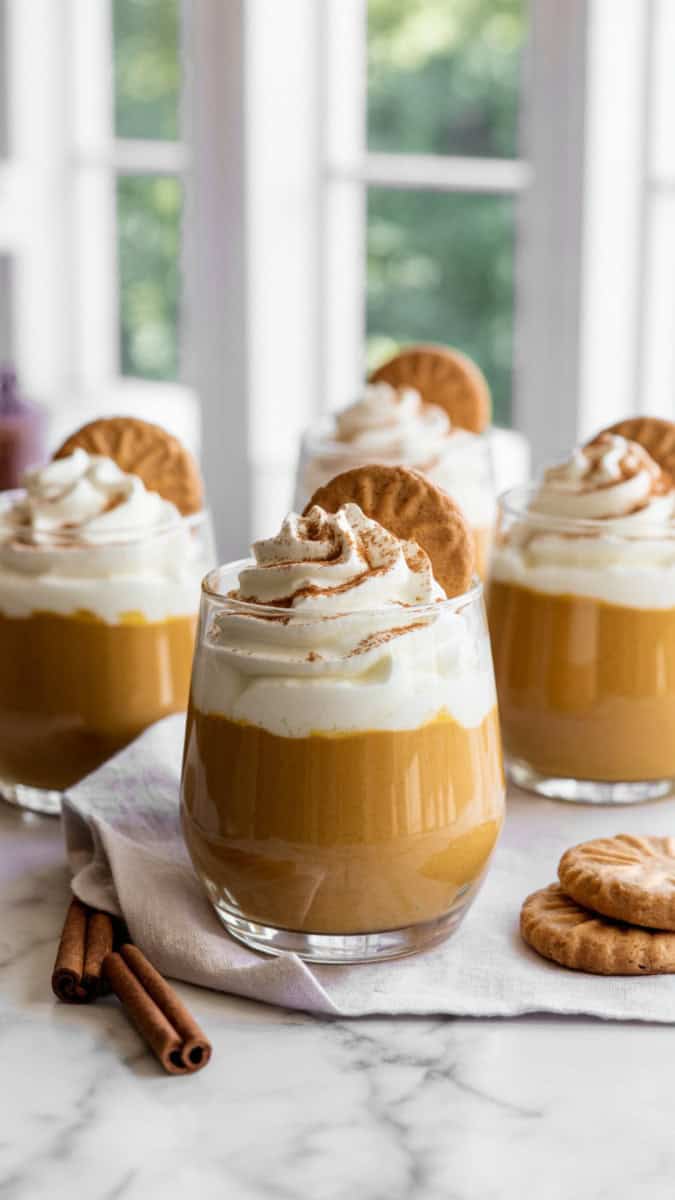
If you’ve ever wished pumpkin pie came in a grab-and-go cup, this is it! Pumpkin pudding cups are quick, creamy, and perfectly spiced like pumpkin pie without the crust. They’re layered with whipped cream for that cozy fall vibe and can be dressed up with cookie crumbles, granola, or even a caramel drizzle.
Best of all, they take just 10 minutes to make and look like you spent way more time on them. My family loves these for after-dinner desserts, and I love that they’re make-ahead friendly for holiday entertaining.

Why You’ll Love This Quick Fall Dessert
- Fast & Easy: Whips up in minutes with pantry staples.
- Make-Ahead Friendly: Chill them in the fridge until you’re ready to serve.
- Customizable: Add cookies, granola, caramel, or nuts for endless variations.
- Kid-Friendly: A fun dessert kids can help assemble.
Simple Ingredients
You’ll only need a handful of simple ingredients:
- Pumpkin Puree: Adds rich pumpkin flavor.
- Instant Vanilla Pudding Mix: Creates a smooth, creamy base.
- Milk: Helps the pudding set properly.
- Pumpkin Pie Spice: Brings that cozy autumn flavor.
- Whipped Topping: Makes the pudding fluffy and light.
- Whipped Cream & Cinnamon: For garnish and presentation.
- Optional Cookies or Granola: Adds texture and a fun twist.

Servings and Timings
Servings: 6 cups
Prep Time: 10 minutes
Chill Time: 30 minutes
Total Time: 40 minutes
What is Needed
- 1 cup pumpkin puree
- 1 box (3.4 oz) instant vanilla pudding mix
- 2 cups cold milk
- 1 tsp pumpkin pie spice
- 8 oz whipped topping
- Whipped cream & cinnamon for topping
- Optional: crushed cookies or granola for layers
Instructions
- In a large mixing bowl, whisk together the instant pudding mix, cold milk, pumpkin puree, and pumpkin pie spice until the mixture is completely smooth and lump-free. Whisk for about 2 minutes, then place the bowl in the refrigerator for 10 minutes to allow the pudding to thicken slightly.
- Once the pudding has thickened, gently fold in the whipped topping using a spatula. Mix just until combined the goal is to keep the mixture light and airy, so avoid overmixing.
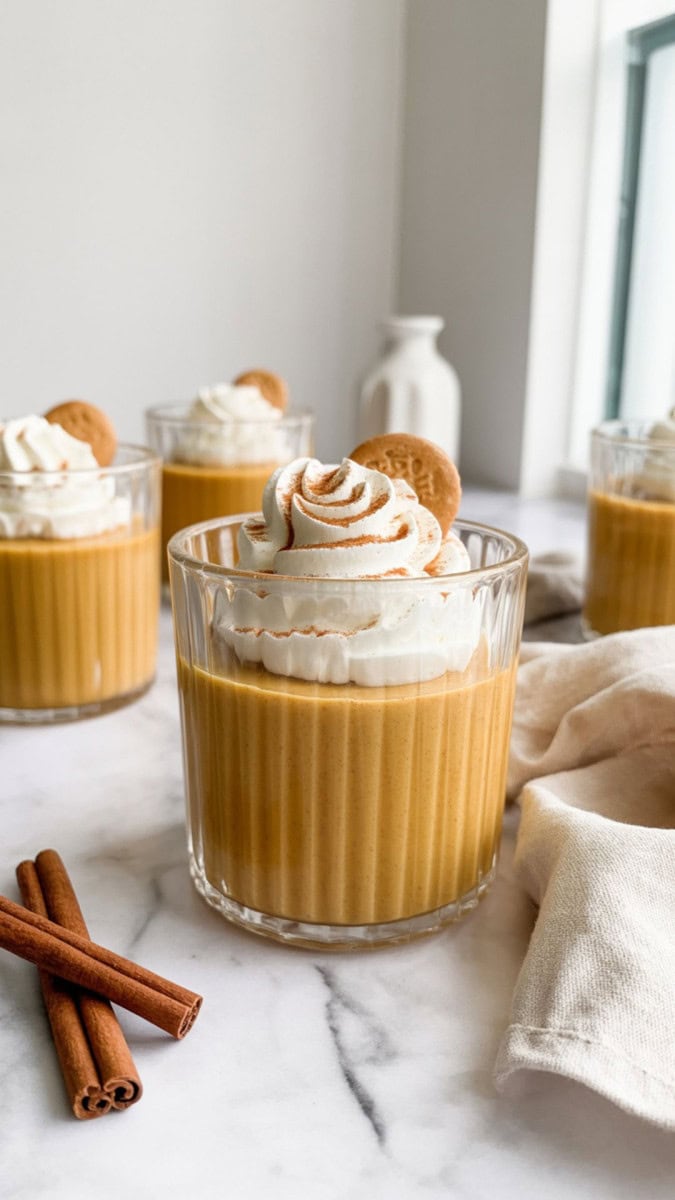
- Spoon or pipe the pumpkin pudding mixture into small clear dessert cups or jars for a pretty layered look. If desired, add a layer of crushed cookies or granola between the pudding layers for extra texture and flavor.
- Cover the cups with plastic wrap and refrigerate for at least 30 minutes. This helps the flavors meld together and gives the pudding a firmer, creamier consistency.
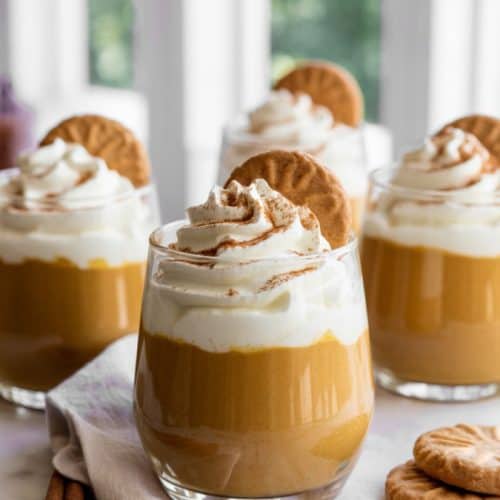
- Just before serving, top each cup with a swirl of whipped cream, a light sprinkle of cinnamon, and a small cookie or handful of granola for garnish. Serve chilled and enjoy!
How to Serve It Beautifully
Serve in mini mason jars or fancy dessert cups with a sprinkle of cinnamon and a cookie garnish for a beautiful fall presentation.
Top Tips
- Chill the pudding before folding in the whipped topping for a thicker texture.
- Use clear glass cups or mini mason jars for a beautiful presentation.
- For bakery-style looks, use a piping bag for both pudding and whipped cream.
Flavor Boosters
- Add a splash of vanilla extract for depth.
- Swirl in caramel or chocolate sauce for extra indulgence.
- Top with crushed toffee or candied pecans for crunch.
Recipe Variations
- Make it dairy-free using almond milk and coconut whipped topping.
- Add a scoop of protein powder for a more filling snack.
- Turn it into a parfait by alternating pudding with granola and fruit.
Party-Perfect Presentation
For holidays or entertaining, serve these pudding cups in mini shot glasses or elegant dessert cups. Add a drizzle of caramel and a small cookie or cinnamon stick for a bakery-worthy finish.
Recommended Equipment
- Mixing bowls
- Whisk & spatula
- Piping bag (optional)
- Small cups or jars
Make Ahead Tips
These cups are best made 1–2 days ahead. Add whipped cream and garnishes just before serving for the freshest look.
How to Store
- Refrigerate: Keep covered for up to 3 days.
- These do not freeze well the texture changes when thawed.
Troubleshooting Your Pumpkin Pudding Cups
Why is my pudding too runny? Ensure you use cold milk and allow enough chilling time.
Why did my pudding form a skin? Cover directly with plastic wrap on the surface while chilling.
The flavor isn’t strong enough what can I do? Add more pumpkin pie spice or a pinch of cinnamon and nutmeg.
What You Need to Know About This Recipe
Pudding cups became a popular make-ahead dessert in the mid-20th century, evolving from classic custards into fun, portable treats. This pumpkin version brings those nostalgic vibes with a seasonal twist perfect for quick family desserts or party tables.
Pumpkin Pudding Cups
Equipment
- Mixing bowls
- Whisk & spatula
- Piping bag (optional)
- Small dessert cups or jars
Ingredients
- 1 cup pumpkin puree
- 1 box 3.4 oz instant vanilla pudding mix
- 2 cups cold milk
- 1 tsp pumpkin pie spice
- 8 oz whipped topping
- Whipped cream & cinnamon for topping
- Optional: crushed cookies or granola for layers
Instructions
- In a large mixing bowl, whisk together the instant pudding mix, cold milk, pumpkin puree, and pumpkin pie spice until the mixture is completely smooth and lump-free. Whisk for about 2 minutes, then place the bowl in the refrigerator for 10 minutes to allow the pudding to thicken slightly.
- Once the pudding has thickened, gently fold in the whipped topping using a spatula. Mix just until combined the goal is to keep the mixture light and airy, so avoid overmixing.
- Spoon or pipe the pumpkin pudding mixture into small clear dessert cups or jars for a pretty layered look. If desired, add a layer of crushed cookies or granola between the pudding layers for extra texture and flavor.
- Cover the cups with plastic wrap and refrigerate for at least 30 minutes. This helps the flavors meld together and gives the pudding a firmer, creamier consistency.
- Just before serving, top each cup with a swirl of whipped cream, a light sprinkle of cinnamon, and a small cookie or handful of granola for garnish. Serve chilled and enjoy!
Notes
- Chill at least 30 minutes before serving for best texture.
- Use a piping bag for a polished layered look.
One-Pot Cooking Rocks!

Michelle
Hi, I’m Michelle, the founder, owner, author, and editor of OvenSpot. My passion for one-pot cooking commenced when I was working to prepare cafeteria lunches for school students. I am now on a mission to assist you in choosing the cooking pot or appliance you will use daily. As well as in-depth information to assist you in using and caring for your cookware and appliances. Along with the yummy recipes I use at home.
Questions? Reach out to Michelle at [email protected]