Crispy Honey Garlic Chicken Wings with the Best Homemade Sauce
There’s a moment, somewhere between pulling the tray from the oven and calling everyone to the table, when the kitchen smells like something that could only be described as deeply good. Caramelised honey. Warm garlic. That slightly smoky edge from the roasting pan. If you’ve stood in that moment before, you already know what honey garlic chicken wings can do to a room.
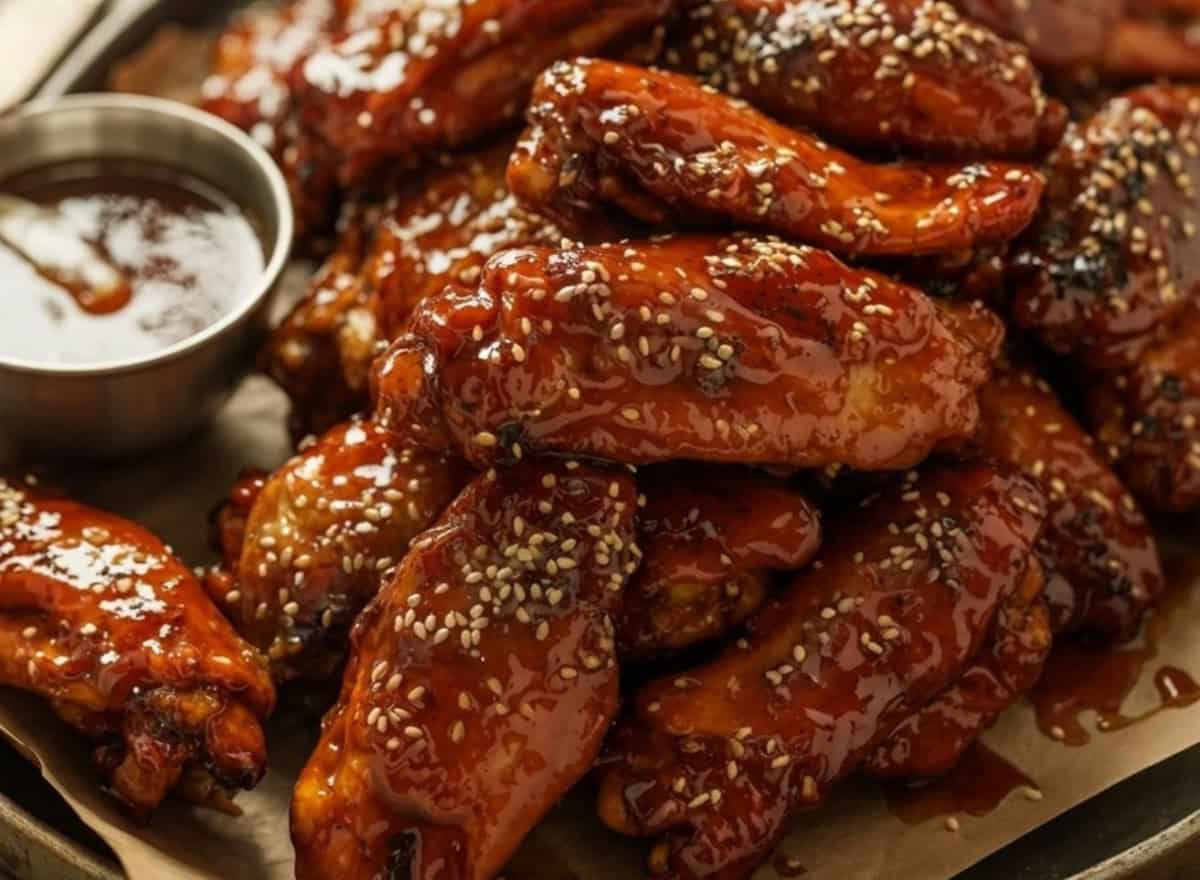
This recipe gives you wings that are sticky in the best way glossy with a sweet, savoury glaze that clings to every crispy edge and pools just slightly at the base of the tray. They bake beautifully in the oven, come together with a sauce you probably have ingredients for right now, and have a way of disappearing faster than almost anything else you’ll make this year.
Why You’ll Love This Honey Garlic Chicken Wings Recipe
Honey garlic chicken wings sit at a particular crossroads that not many recipes manage to reach: crowd-pleasing enough for game day, simple enough for a Tuesday, and flavourful enough that people ask you for the recipe before they’ve even finished eating.
The sauce itself is the star. Honey brings sweetness and that lacquered finish. Garlic adds depth and a gentle savouriness. Soy sauce ties it together with a little umami backbone. Together they reduce into a glaze that coats the wings and caramelises at the edges into something sticky and golden.
What makes this version particularly reliable is the method. The wings go into a hot oven first roasted until the skin is genuinely crispy then get tossed in the sauce and returned for a final blast of heat. That two-stage process means you get crispy skin and sticky glaze, rather than having to choose one or the other.
Simple Ingredients
Everything here is pantry-friendly and purposeful. Here’s what you’re working with and why each ingredient earns its place.
- Chicken wings (whole, split into drumettes and flats): The cut matters here. Splitting the wings into drumettes and flats means more surface area, which means more glaze, more caramelisation, and more of the crispy edges that make this so good. Most supermarkets sell them pre-split; if not, a sharp knife at the joint takes about two minutes.
- Baking powder: This is the secret to genuinely crispy baked wings without deep frying. A small amount tossed through before roasting draws moisture from the skin and creates tiny air bubbles as it cooks, resulting in skin that blisters and crisps in a way plain flour never quite achieves.
- Salt and white pepper: Seasoned well before they go in the oven, not after. White pepper is milder than black and blends into the coating without speckling the glaze.
- Honey: The foundation of the sauce. Use a good-quality runny honey the flavour will be present in the finished dish. Raw or wildflower honey both work beautifully here.
- Garlic (fresh, minced): Fresh garlic makes a real difference in the sauce. It mellows and sweetens as it cooks, losing the sharpness of raw garlic while keeping all of the depth. Four generous cloves is not too many.
- Soy sauce: Brings saltiness and that savoury, slightly fermented note that keeps the sauce from being one-dimensionally sweet. Low-sodium soy sauce works if you prefer.
- Butter: Stirred into the sauce at the end, butter adds richness and gloss. It’s what gives the glaze that restaurant-quality shine.
- Rice wine vinegar: A small amount brightens the whole sauce and cuts through the sweetness just enough. Apple cider vinegar works as a substitute.
- Sesame oil: Just a small drizzle added off the heat, for a warm, nutty note that anchors the sauce without overwhelming it.
- Chilli flakes (optional): For those who like a gentle heat alongside the sweet. A quarter teaspoon is subtle; half a teaspoon makes itself known.
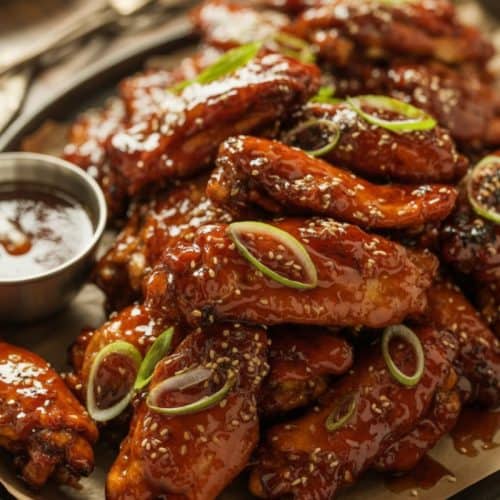
- Sesame seeds and sliced spring onion: For finishing. They add texture, colour, and that final touch that takes the plate from home cooking to something worth photographing.
Recipe Details
- Servings: 4–6
- Preparation time: 15 minutes
- Cook time: 50–55 minutes
- Total time: Approximately 1 hour 10 minutes
Recommended Equipment
- Large mixing bowl
- Wire rack set over a lined baking tray (essential for crispy skin)
- Small saucepan
- Pastry brush or tongs
- Sharp knife and chopping board
- Microplane or fine grater (for garlic)

What Is Needed
For the wings:
- 1.2kg chicken wings, split into drumettes and flats, tips removed
- 1 tablespoon baking powder
- 1 teaspoon salt
- ½ teaspoon white pepper
For the honey garlic sauce:
- 4 tablespoons honey
- 4 cloves garlic, finely minced
- 3 tablespoons soy sauce
- 1 tablespoon butter
- 1 tablespoon rice wine vinegar
- 1 teaspoon sesame oil
- ¼–½ teaspoon chilli flakes (optional)
To serve:
- Sesame seeds
- 2 spring onions, thinly sliced
- Extra honey to drizzle (optional)
How to Make Honey Garlic Chicken Wings
Step 1: Dry the Wings
Pat the chicken wings completely dry with paper towels. This step is not optional surface moisture is the enemy of crispy skin, and the drier the wings going into the oven, the better the result coming out.
Once dry, place in a large bowl and toss with the baking powder, salt, and white pepper until every piece is evenly coated.
Step 2: Roast Until Crispy
Preheat your oven to 220°C (200°C fan / 425°F). Set a wire rack over a foil-lined baking tray and arrange the wings in a single layer, skin side up. Do not crowd them space allows the heat to circulate and the skin to crisp rather than steam.
Roast for 40–45 minutes, flipping once halfway through, until the skin is deeply golden and visibly crispy.
Step 3: Make the Honey Garlic Sauce
While the wings are in their final 10 minutes of roasting, make the sauce. In a small saucepan over medium heat, melt the butter. Add the minced garlic and cook for 1–2 minutes, stirring frequently, until it turns just golden and fragrant watch it closely, garlic at this stage goes from golden to burnt quickly.
Add the honey, soy sauce, rice wine vinegar, and chilli flakes if using. Stir to combine and let the sauce simmer for 3–4 minutes until it thickens slightly and coats the back of a spoon. Remove from the heat and stir through the sesame oil.
Step 4: Glaze and Return to the Oven
Remove the crispy wings from the oven. Transfer them to a clean large bowl and pour over about two-thirds of the sauce. Toss well until every wing is coated in the glossy honey garlic glaze.
Return the wings to the wire rack (a little of the sauce will drip through this is fine) and roast for a further 8–10 minutes. The glaze will caramelise and darken at the edges, which is exactly what you want.
Step 5: Finish and Serve
Remove from the oven and toss with any remaining sauce. Transfer to a serving platter, scatter generously with sesame seeds and sliced spring onion, and serve immediately.

What to Serve With Honey Garlic Chicken Wings
- Steamed jasmine rice to soak up the extra glaze
- A crisp Asian-style slaw with sesame dressing
- Soft flatbreads or steamed bao buns
- Cucumber ribbons with rice wine vinegar
- A simple green salad with a light ginger dressing
- Extra sauce on the side for dipping
Top Tips
Always use a wire rack: Placing the wings directly on a lined tray causes them to sit in their own rendered fat as they cook, which softens the skin. A rack lifts them clear and lets heat circulate underneath. If you don’t have a wire rack, propping them up on a bed of scrunched foil achieves a similar result.
Don’t skip the baking powder: It’s the single step that separates baked wings that are actually crispy from baked wings that are just cooked. The alkaline environment it creates helps the skin dry out and blister in the oven.
Really pat them dry: Paper towels, firmly pressed, front and back. Surface moisture turns to steam in the oven and softens the skin before it has a chance to crisp. Take an extra 30 seconds here it pays off.
Give the sauce time to caramelise: That final 8–10 minutes back in the oven after glazing is where the magic happens. The sugars in the honey darken and concentrate, the edges go slightly sticky and charred, and the flavour deepens noticeably. Don’t cut this step short.
Make it ahead: The wings can be roasted through Step 2, cooled, and refrigerated for up to 24 hours. When ready to serve, bring them back to room temperature, make the sauce fresh, glaze them, and roast for 12–15 minutes until heated through and caramelised. This makes this chicken wings recipe genuinely easy for entertaining.
Adjust the sweetness: If you prefer less sweetness, reduce the honey to 3 tablespoons and add a touch more soy sauce. If you want more depth, a teaspoon of oyster sauce stirred into the glaze adds a lovely savoury note without changing the character of the dish.
Recipe Variations
Honey garlic chicken wings in the air fryer: Coat and season as per Step 1. Cook in a single layer at 200°C for 22–25 minutes, flipping halfway. Toss in the sauce and return for a further 4–5 minutes. The skin comes out particularly crispy this way arguably crispier than the oven.
Baked honey garlic chicken wings (lower temperature, longer time): For a gentler approach, roast at 190°C for 55–60 minutes, flipping twice. The result is slightly softer skin with very tender, almost falling-off-the-bone meat. Better suited to a sit-down dinner than finger food.
Honey garlic chicken wings crockpot: Place raw wings in the slow cooker with the honey garlic sauce ingredients (skip the butter and sesame oil). Cook on low for 4–5 hours. Finish under a hot grill for 8–10 minutes to caramelise the glaze and crisp the skin this step is not optional if you want texture.
Spicy honey garlic wings: Double the chilli flakes and add a teaspoon of sriracha or gochujang to the sauce. The heat plays beautifully against the sweetness of the honey.
Sticky honey garlic chicken wings with ginger: Add a tablespoon of freshly grated ginger to the sauce alongside the garlic. It gives the glaze a warmer, slightly more complex character particularly good in cooler months.
Lemon honey garlic wings: Add the zest of one lemon to the sauce and swap the rice wine vinegar for fresh lemon juice. Brighter, more summery, and excellent served at room temperature.
How to Store and Reheat
Refrigerating: Allow the wings to cool completely before storing in an airtight container in the fridge for up to 3 days. The glaze will thicken in the cold but loosens beautifully when reheated.
Reheating for best results: Place on a wire rack set over a baking tray and reheat at 200°C for 10–12 minutes. This method restores most of the crispiness. Avoid the microwave it reheats efficiently but softens the skin entirely.
Freezing: Freeze the cooked and glazed wings in a single layer on a tray until solid, then transfer to a zip-lock bag or airtight container for up to 2 months. Reheat directly from frozen at 200°C for 18–20 minutes, checking they are piping hot throughout before serving.
Freezing the sauce separately: The honey garlic sauce freezes well on its own for up to 3 months. Thaw overnight in the fridge and warm gently in a small saucepan before using.
Honey Garlic Chicken Wings
Equipment
- Large mixing bowl
- Wire rack set over a lined baking tray (essential for crispy skin)
- Small saucepan
- Pastry brush or tongs
- Sharp knife and chopping board
- Microplane or fine grater (for garlic)
Ingredients
- 1.2 kg chicken wings split into drumettes and flats, tips removed
- 1 tablespoon baking powder
- 1 teaspoon salt
- ½ teaspoon white pepper
- 4 tablespoons honey
- 4 cloves garlic finely minced
- 3 tablespoons soy sauce
- 1 tablespoon butter
- 1 tablespoon rice wine vinegar
- 1 teaspoon sesame oil
- ¼ –½ teaspoon chilli flakes optional
- 2 spring onions thinly sliced
- Extra honey to drizzle optional
Instructions
- Pat the chicken wings completely dry with paper towels. This step is not optional surface moisture is the enemy of crispy skin, and the drier the wings going into the oven, the better the result coming out.
- Once dry, place in a large bowl and toss with the baking powder, salt, and white pepper until every piece is evenly coated.
- Preheat your oven to 220°C (200°C fan / 425°F). Set a wire rack over a foil-lined baking tray and arrange the wings in a single layer, skin side up. Do not crowd them — space allows the heat to circulate and the skin to crisp rather than steam.
- Roast for 40–45 minutes, flipping once halfway through, until the skin is deeply golden and visibly crispy.
- While the wings are in their final 10 minutes of roasting, make the sauce. In a small saucepan over medium heat, melt the butter. Add the minced garlic and cook for 1–2 minutes, stirring frequently, until it turns just golden and fragrant watch it closely, garlic at this stage goes from golden to burnt quickly.
- Add the honey, soy sauce, rice wine vinegar, and chilli flakes if using. Stir to combine and let the sauce simmer for 3–4 minutes until it thickens slightly and coats the back of a spoon. Remove from the heat and stir through the sesame oil.
- Remove the crispy wings from the oven. Transfer them to a clean large bowl and pour over about two-thirds of the sauce. Toss well until every wing is coated in the glossy honey garlic glaze.
- Return the wings to the wire rack (a little of the sauce will drip through this is fine) and roast for a further 8–10 minutes. The glaze will caramelise and darken at the edges, which is exactly what you want.
- Remove from the oven and toss with any remaining sauce. Transfer to a serving platter, scatter generously with sesame seeds and sliced spring onion, and serve immediately.
Notes
- Always use a wire rack
- Don’t skip the baking powder
- Really pat them dry
- Give the sauce time to caramelise

Michelle
Hi, I’m Michelle, the founder, owner, author, and editor of OvenSpot. My passion for one-pot cooking commenced when I was working to prepare cafeteria lunches for school students. I am now on a mission to assist you in choosing the cooking pot or appliance you will use daily. As well as in-depth information to assist you in using and caring for your cookware and appliances. Along with the yummy recipes I use at home.
Questions? Reach out to Michelle at [email protected]