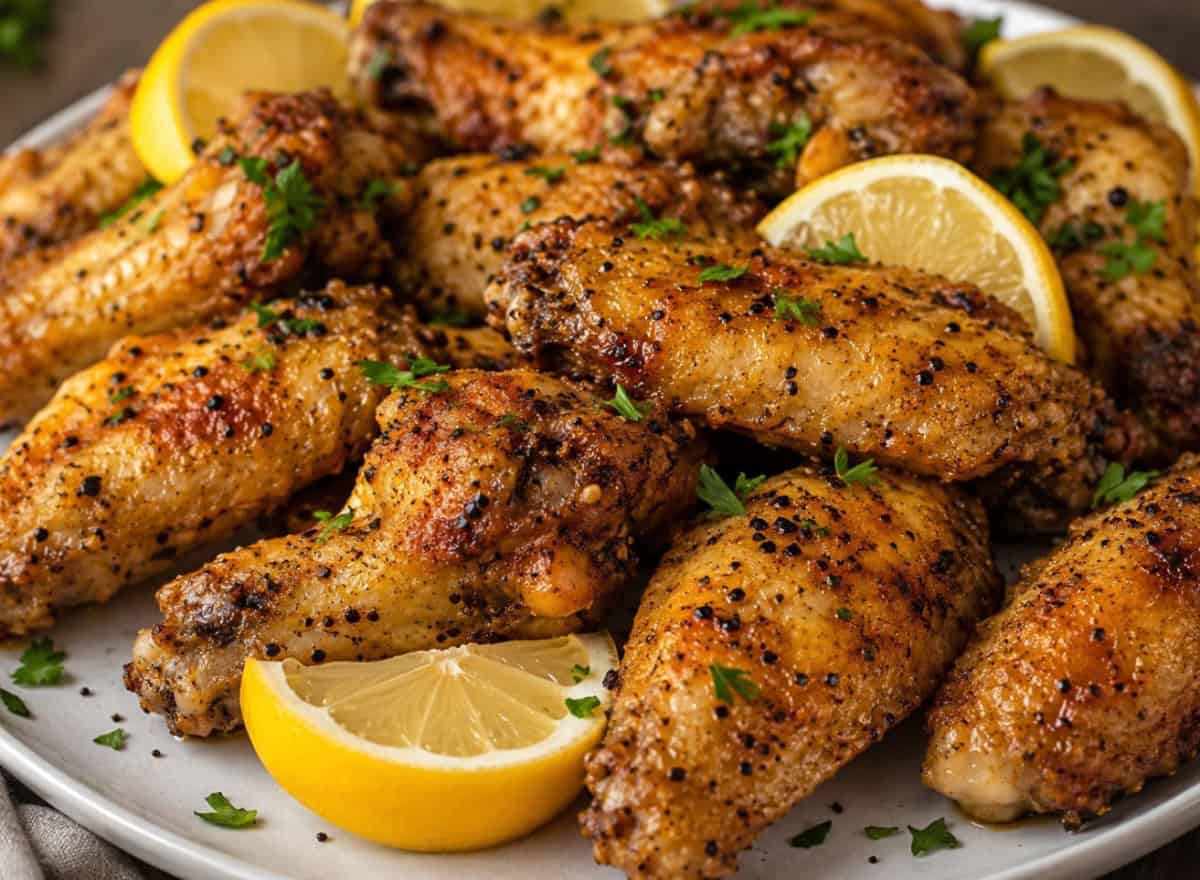
Crispy Baked Lemon Pepper Chicken Wings: Better Than Takeout
There’s something about lemon pepper chicken wings that feels a little bit special that bright, zesty coating, the kind of crunch that makes you reach for another before you’ve even finished the first. They have a way of turning an ordinary evening into something worth gathering around.
The thing is, most people assume that kind of crunch only happens in a deep fryer. But after a lot of testing in my own oven, I can tell you with complete confidence: baked lemon pepper chicken wings can be every bit as crispy, every bit as satisfying, and honestly a lot easier to make at home than you might expect.
No hot oil. No mess. Just beautifully golden wings with crackling skin and that punchy lemon pepper flavour all the way through.
You’ll Love This Lemon Pepper Chicken Wings Recipe
This is the kind of recipe that becomes a regular in your rotation the sort of thing you make once and then find yourself thinking about on a Tuesday afternoon when you’re deciding what to cook for dinner.
Here’s why it works so well:
The crunch is real. A simple baking powder trick (more on that below) transforms the skin into something genuinely crispy without a drop of oil for frying. It’s one of those small techniques that makes a big difference.
The lemon pepper flavour is bold and bright. Homemade lemon pepper seasoning just lemon zest, cracked black pepper, and a little salt tastes completely different from the store-bought version. Fresher, more aromatic, and far more flavourful.
They’re baked, not fried. Which means less mess, less fuss, and a lighter result that still delivers on every level. These are crispy oven baked lemon pepper chicken wings done properly.
They suit almost any occasion. Game night, a weekend gathering, a casual family dinner these wings fit every mood.
The Secret to Crispy Baked Wings
If you’ve ever pulled baked wings from the oven and been disappointed by soft, rubbery skin, the problem is almost always moisture. Chicken skin holds a lot of water, and in the oven, that water steams rather than crisps.
The fix is simple: baking powder.
Coating your wings in a small amount of baking powder before they go into the oven raises the skin’s pH level, which helps it brown faster and dehydrate more effectively. The result is crackling, golden skin without any deep frying at all.
One important note: use aluminium-free baking powder, not baking soda. Baking soda is too strong and will leave a metallic taste.
The other key step? Dry your wings thoroughly before seasoning. Pat them well with paper towel and, if you have time, let them sit uncovered in the fridge for an hour or two. That extra drying time makes a noticeable difference to the final crunch.
Simple Ingredients
Everything here is straightforward and easy to find. The lemon pepper seasoning is made fresh, which is what makes these wings taste so much better than anything you’d get from a takeaway counter.
- Chicken wings: Split at the joint into drumettes and flats, or buy them pre-split. Either works beautifully.
- Baking powder (aluminium-free): The crunch secret. Just a small amount is all you need.
- Fresh lemon zest: The heart of the flavour. Use a microplane or fine grater and zest directly onto the wings so none of the essential oils escape.
- Cracked black pepper: Generous and coarse. Pre-ground pepper works, but freshly cracked has more warmth and depth.
- Garlic powder: Adds a savoury base note that rounds out the lemon and pepper beautifully.
- Onion powder: A quiet background flavour that adds body to the seasoning.
- Salt: Seasons the skin and helps draw out moisture before baking.
- Olive oil or melted butter: Just a small amount, tossed through after baking, to help the seasoning cling and add a little richness.
- Extra lemon, for serving: A squeeze of fresh lemon over the finished wings just before serving lifts everything and doubles down on that brightness.
Recipe Details
Servings: 4
Preparation time: 15 minutes (plus 1–2 hours drying time if possible)
Cook time: 45–50 minutes
Total time: Approximately 1 hour
Recommended Equipment
Large baking tray or sheet pan
Wire rack (to sit inside the tray this is important for airflow)
Paper towel
Mixing bowl
Microplane or fine grater
Tongs
What Is Needed
For the wings:
1kg chicken wings, split into drumettes and flats
1 teaspoon baking powder (aluminium-free)
1 teaspoon salt
For the lemon pepper seasoning:
Zest of 2 lemons
1½ teaspoons cracked black pepper
½ teaspoon garlic powder
½ teaspoon onion powder
¼ teaspoon salt
To finish:
1 tablespoon melted butter or olive oil
Extra lemon wedges, to serve
How to Make Crispy Baked Lemon Pepper Chicken Wings
Step 1: Dry the Wings
Pat the chicken wings thoroughly dry with paper towel take your time here. The drier the skin, the crispier the result.
Place them on a wire rack set over a baking tray and leave them uncovered in the fridge for at least 1 hour, or up to overnight. This step is optional but genuinely worth doing if you have the time.
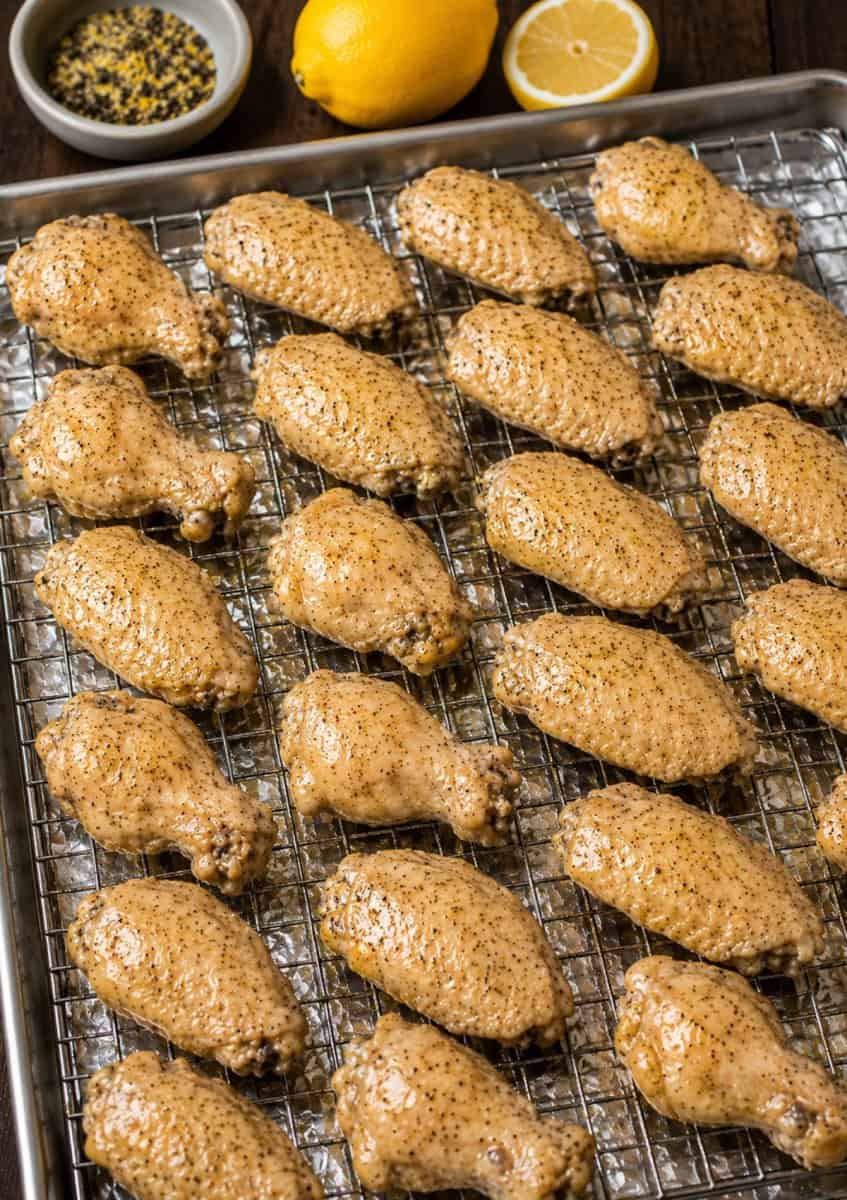
Step 2: Season with Baking Powder
Preheat your oven to 220°C (200°C fan). Line a large baking tray with foil and place a wire rack on top. Lightly spray the rack with cooking oil.
In a large mixing bowl, toss the dried wings with the baking powder and 1 teaspoon of salt until every piece is lightly coated. Make sure the coating is even this is what gives you uniform crunch across every wing.
Step 3: Bake
Arrange the wings on the wire rack in a single layer, skin side up, with a little space between each piece. This is important crowding the pan traps steam and softens the skin.
Bake for 25 minutes, then flip each wing and bake for a further 20–25 minutes, until the skin is deeply golden, visibly bubbled, and crisp to the touch.
Step 4: Make the Lemon Pepper Seasoning
While the wings are in the oven, combine the lemon zest, cracked black pepper, garlic powder, onion powder, and remaining salt in a small bowl. Mix well.
The zest will be fragrant and slightly damp this is exactly right. It means the flavour is fresh and the oils are fully intact.
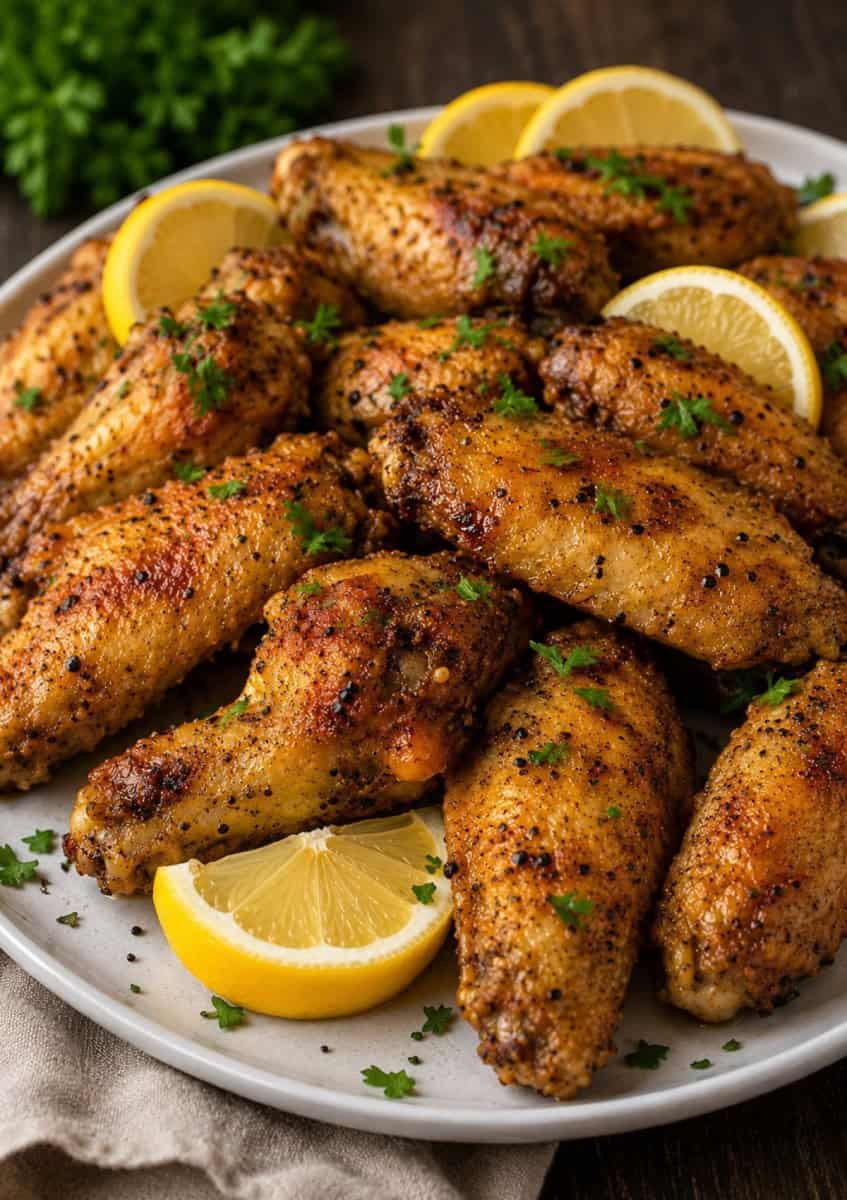
Step 5: Toss and Serve
Remove the wings from the oven and transfer immediately to a large bowl. Drizzle over the melted butter or olive oil, then sprinkle the lemon pepper seasoning over the top. Toss well to coat every piece.
Taste one and adjust more lemon zest, more pepper, a little extra salt until it’s exactly right for you.
Serve immediately with lemon wedges on the side, and a cold drink within reach.
What to Serve With Lemon Pepper Chicken Wings
- Ranch or blue cheese dipping sauce: The classic pairing. Cool and creamy against all that bright citrus heat.
- Celery and carrot sticks: Fresh, crunchy, and they balance the richness of the wings beautifully.
- Garlic butter corn on the cob: A wonderful summer side. Sweet corn alongside lemony wings is a combination worth trying.
- A simple green salad with a vinaigrette: Keeps things light and lets the wings be the star.
- Potato wedges or sweet potato fries: For a more substantial spread. These wings are a natural match for anything golden and crispy.
- Coleslaw: Creamy and cool, it provides exactly the right contrast.
Nutritional Information
Per serving: estimates only; values will vary based on specific ingredients used.
Calories: 420
Fat: 28g
Saturated Fat: 8g
Cholesterol: 140mg
Sodium: 680mg
Carbohydrates: 2g
Fibre: 0g
Sugar: 0g
Protein: 38g
Top Tips
Don’t skip the wire rack. It’s the single most important piece of equipment for this recipe. Air needs to circulate underneath the wings, otherwise the underside steams and goes soft. A wire rack set inside your baking tray makes the difference between crispy all over and crispy on top, soggy underneath.
Dry time is not wasted time. Even 30 minutes of air-drying in the fridge makes a visible difference. An hour is better. Overnight is the best of all. If you’re planning ahead, this is the step worth scheduling in.
Zest your lemon at the last minute. Lemon zest loses its intensity quickly once it’s been grated. Zesting right before you’re ready to toss the wings means maximum flavour and fragrance.
Don’t toss the wings in the seasoning too early. The lemon pepper seasoning goes on after baking, not before. If you season with lemon zest before baking, it will burn and turn bitter. Season the raw wings with just the baking powder and salt.
Taste before you serve. Lemon pepper seasoning is easy to adjust more zest for brightness, more pepper for warmth, a little extra salt to tie it all together. A quick taste and tweak before serving makes all the difference.
Serve straight away. These wings are at their absolute best the moment they come out of the oven. If you need to hold them warm, place them back on the wire rack in a low oven (about 100°C) until ready to serve, but don’t leave them too long.
Recipe Variations
Honey lemon pepper chicken wings: After tossing in the seasoning, drizzle over a tablespoon of warm honey and toss again. The sweetness softens the pepper’s edge and adds a gorgeous glaze. Hugely popular for a reason.
Lemon pepper chicken wings with ranch: Serve with a generous bowl of homemade ranch on the side. The creamy coolness is the perfect counterpoint to the citrus and pepper. You can also use ranch as a dipping base for the lemon pepper seasoning a combination that has its own devoted following.
Crispy lemon pepper chicken wings in the air fryer: Cook at 200°C for 22–25 minutes, flipping halfway. The air fryer produces excellent results deeply crispy skin in less time. Season with the lemon pepper mix immediately after cooking, exactly as you would for the oven version.
Lemon pepper dry rub wings baked: Keep everything as written but skip the butter or oil finish for a true dry-rub style. The seasoning clings directly to the crisped skin and the flavour is more concentrated and intense.
Boneless lemon pepper chicken wings: Use chicken breast cut into strips or nugget-sized pieces, coat in the baking powder mixture, and bake at 220°C for 18–22 minutes. Toss in the lemon pepper seasoning straight from the oven. A great option for younger family members or anyone who prefers boneless.
Lemon pepper parmesan chicken wings: Add 2 tablespoons of finely grated parmesan to the seasoning mix before tossing. The parmesan adds a savoury, nutty depth that plays beautifully against the lemon. One of my favourite variations.
How to Store and Reheat
Refrigerating: Store leftover wings in an airtight container in the fridge for up to 3 days. The skin will soften as they cool, which is completely normal.
Reheating for crunch: The best way to revive leftover wings is in the oven or air fryer, not the microwave. Place on a wire rack in a 200°C oven for 10–12 minutes, or in the air fryer at 190°C for 6–8 minutes. The skin will crisp back up beautifully.
Avoid the microwave for reheating: It warms the wings but the skin becomes soft and slightly rubbery. Save the microwave for when crunch isn’t the priority.
Freezing: Cool completely, then freeze in a single layer before transferring to a zip-lock bag. Freeze for up to 2 months. Reheat straight from frozen in a 200°C oven for 18–22 minutes, flipping halfway.

Lemon Pepper Chicken Wings
Equipment
- Large baking tray or sheet pan
- Wire rack
- Paper towel
- Mixing bowl
- Microplane or fine grater
- Tongs
Ingredients
- 1 kg chicken wings split into drumettes and flats
- 1 teaspoon baking powder aluminium-free
- 1 teaspoon salt
- Zest of 2 lemons
- 1½ teaspoons cracked black pepper
- ½ teaspoon garlic powder
- ½ teaspoon onion powder
- ¼ teaspoon salt
- 1 tablespoon melted butter or olive oil
- Extra lemon wedges to serve
Instructions
- Pat the chicken wings thoroughly dry with paper towel take your time here. The drier the skin, the crispier the result.
- Place them on a wire rack set over a baking tray and leave them uncovered in the fridge for at least 1 hour, or up to overnight. This step is optional but genuinely worth doing if you have the time.
- Preheat your oven to 220°C (200°C fan). Line a large baking tray with foil and place a wire rack on top. Lightly spray the rack with cooking oil.
- In a large mixing bowl, toss the dried wings with the baking powder and 1 teaspoon of salt until every piece is lightly coated. Make sure the coating is even this is what gives you uniform crunch across every wing.
- Arrange the wings on the wire rack in a single layer, skin side up, with a little space between each piece. This is important crowding the pan traps steam and softens the skin.
- Bake for 25 minutes, then flip each wing and bake for a further 20–25 minutes, until the skin is deeply golden, visibly bubbled, and crisp to the touch.
- While the wings are in the oven, combine the lemon zest, cracked black pepper, garlic powder, onion powder, and remaining salt in a small bowl. Mix well.
- The zest will be fragrant and slightly damp this is exactly right. It means the flavour is fresh and the oils are fully intact.
- Remove the wings from the oven and transfer immediately to a large bowl. Drizzle over the melted butter or olive oil, then sprinkle the lemon pepper seasoning over the top. Toss well to coat every piece.
- Taste one and adjust more lemon zest, more pepper, a little extra salt until it's exactly right for you.
- Serve immediately with lemon wedges on the side, and a cold drink within reach.

Michelle
Hi, I’m Michelle, the founder, owner, author, and editor of OvenSpot. My passion for one-pot cooking commenced when I was working to prepare cafeteria lunches for school students. I am now on a mission to assist you in choosing the cooking pot or appliance you will use daily. As well as in-depth information to assist you in using and caring for your cookware and appliances. Along with the yummy recipes I use at home.
Questions? Reach out to Michelle at [email protected]