Creative Ways to Use Unripe Apples: Homemade Hard Cider Recipe
Unripe apples might not be the sweetest snack, but they’re perfect for brewing! Their high acidity and natural tannins give homemade hard cider a crisp, refreshing edge that you just can’t get from store-bought bottles. With a little sugar, yeast, and time, you can transform underripe apples into a golden drink that’s as satisfying to sip on a cool evening as it is to share with friends. A first-time brewer or just looking for a way to use windfall apples, this small-batch cider is a fun and delicious project.

Why You’ll Love This Cider Recipe
Unripe (windfall) apples might not taste great fresh, but they’re loaded with natural acids and tannins perfect for cider-making! Their tartness balances beautifully with a little sugar, producing a crisp, refreshing drink. This recipe is simple enough for home brewers and gives you a flavorful way to use up underripe apples.
Simple Ingredients (and Why They’re Used)
- Unripe apples (a mix of varieties works best): The star ingredient. Their tartness and natural tannins give the cider its crisp bite.
- Granulated sugar (to boost fermentation and balance tartness): Boosts alcohol content and balances the sharpness of underripe apples.
- Filtered water (if needed): Adds brightness and enhances the fresh, zesty flavor.
- Lemon juice (optional, to enhance brightness): Ensures a reliable fermentation and cleaner taste than wild yeast.
- Wine or cider yeast (recommended for consistent results, though wild yeast can be used): Helps adjust your juice volume to exactly 1 gallon.
Servings and Timings
Servings: 1 gallon (about 8–10 servings)
Preparation Time: 45 minutes (to wash, chop, juice, and set up ferment)
Fermentation Time: 4–6 weeks (primary + secondary)
Total Time: 4–6 weeks (mostly hands-off)
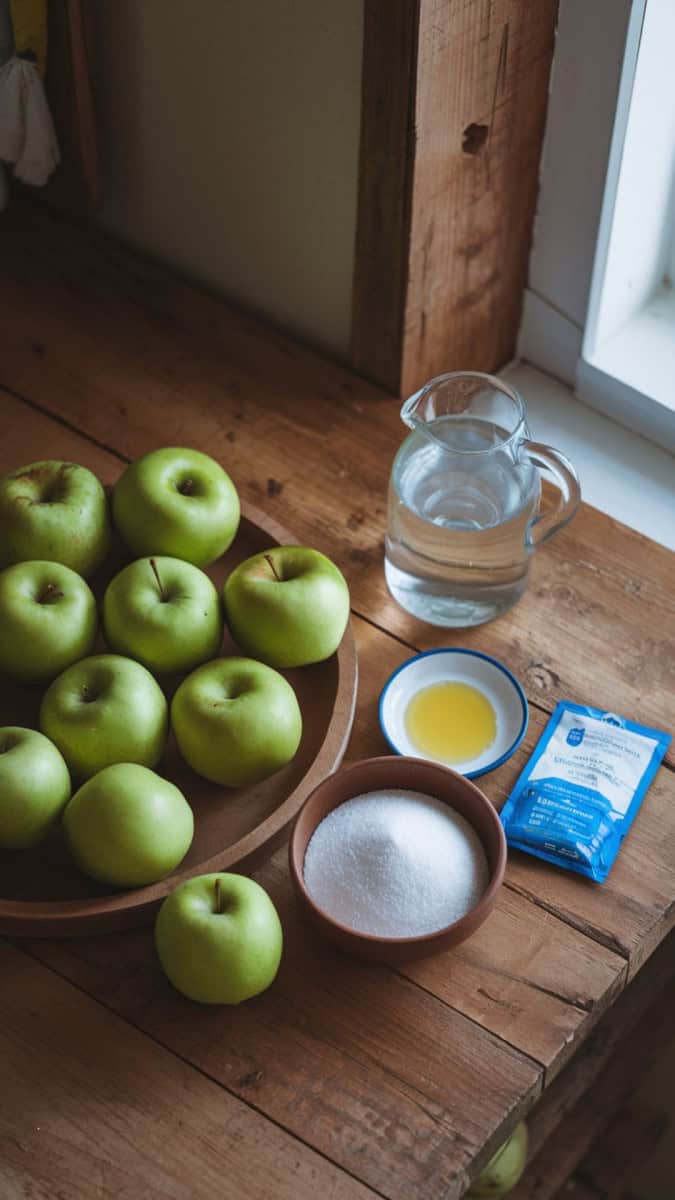
Ingredients
A small beginner-friendly batch of hard cider made with unripe apples (about 1 gallon / 3.8 L). You can scale up or down depending on how many apples you have.
- 10–12 lbs (4.5–5.5 kg) unripe apples (enough to yield about 1 gallon / 3.8 L of juice)
- 1–2 cups (200–400 g) granulated sugar (adjust to taste & tartness of apples)
- 1 Tbsp lemon juice (optional, for brightness)
- 1 packet cider yeast or wine yeast (or ½ packet if using a small batch)
- Filtered water (only if needed to top up to 1 gallon)
Step-by-Step Instructions
1. Prepare the Apples
- Wash unripe apples well. Remove any damaged or rotten spots.
- Chop them roughly, keeping skins and cores (extra pectin and flavor).
2. Extract the Juice
- Use an apple press or juicer to extract juice.
- If using a blender, blend with a little filtered water, then strain through cheesecloth.
- Collect enough juice to nearly fill your fermenting jar, leaving about 2 inches of headspace.
3. Sweeten & Balance
- Taste the juice it will be sharp and tart.
- Stir in 1–2 cups of sugar per gallon of juice, depending on how sweet you’d like the cider.
- Add 1–2 tablespoons lemon juice (optional) for brightness.
4. Add Yeast
- Sprinkle cider or wine yeast on top of the juice.
- Stir gently with a sanitized spoon.
- Fit the fermenting jar with an airlock.
5. First Fermentation
- Place the jar in a cool, dark space (65–70°F / 18–21°C).
- Let ferment for 7–14 days. You’ll see bubbling in the airlock and foam on top.
6. Secondary Fermentation
- Once bubbling slows, carefully siphon cider into a clean jar (leaving sediment behind).
- Let it ferment another 2–3 weeks for clearer, smoother cider.
7. Bottle the Cider
- Once fermentation stops (no bubbling for 2–3 days), siphon into sanitized bottles.
- If you like sparkling cider, add ½ teaspoon sugar to each bottle before sealing.
- Cap tightly and store in a cool place.
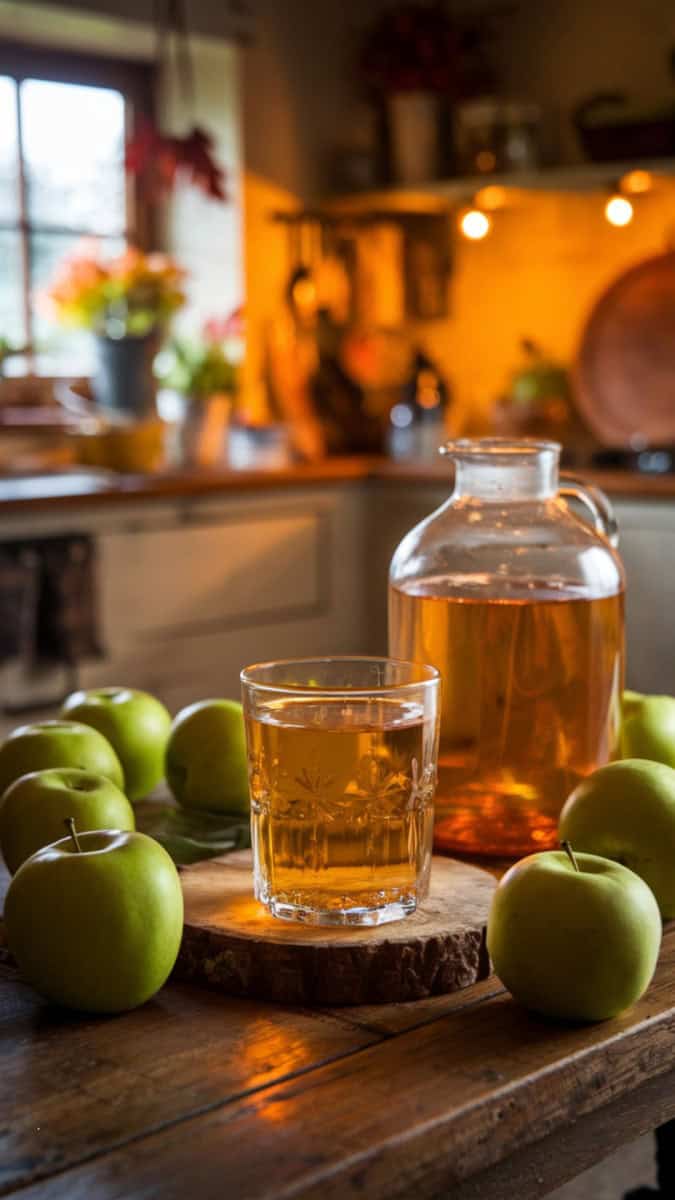
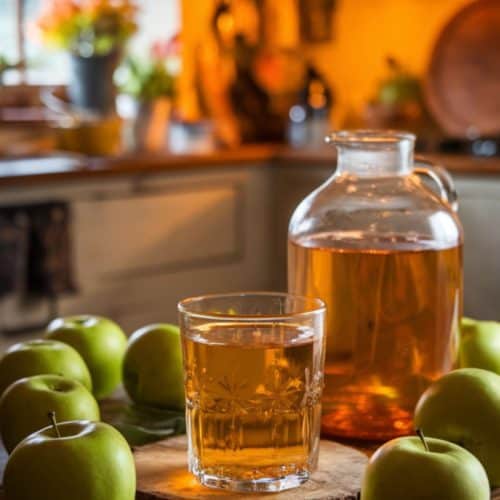
8. Enjoy!
- Let bottles sit for at least 1 week to develop flavor (longer = better).
- Chill before serving. Crisp, tart, and refreshing cider all from unripe apples!
Pro Tips
- Apple Variety Matters: Mixing tart green apples with a few sweeter ripe ones can balance the flavor. All-unripe apples will give a sharper, crisper finish.
- Sweetness Control: The amount of sugar you add directly affects both sweetness and alcohol level. More sugar = stronger cider. Start with 1 cup, then adjust to taste.
- Fermentation Time: Patience is key. If your cider tastes too sharp after 4 weeks, let it age a little longer in bottles for a smoother finish.
- Still vs. Sparkling: For a fizzy cider, add ½ teaspoon of sugar to each bottle before sealing. If you prefer still cider, skip this step.
- Equipment Tip: Always sanitize your jars, bottles, and tools before use. This prevents unwanted bacteria and ensures a clean, safe fermentation.
- Flavor Boosters: Try adding cinnamon sticks, cloves, or ginger during secondary fermentation for a spiced cider twist.
- Vinegar Option: If you leave the cider exposed to air for too long, it may naturally turn into apple cider vinegar still a delicious (and useful) result!
Equipment Needed
- Apple press or juicer (or a strong blender + cheesecloth for straining)
- Large sanitized glass fermenting jar (demijohn or carboy) with airlock
- Sanitized stirring spoon
- Bottles with caps or swing tops for storing finished cider
Perfect Pairings
Hard apple cider pairs wonderfully with both savory and sweet dishes. Here are a few ideas:
- Cheese boards: Especially sharp cheddar, gouda, or blue cheese.
- Grilled meats: Pork chops, sausages, or chicken all shine next to the cider’s tartness.
- Hearty autumn meals: Think roasted vegetables, stews, or even a cozy shepherd’s pie.
- Desserts: Apple cider donuts, spiced cakes, or buttery pies bring out cider’s natural apple sweetness.
Hard Apple Cider
Ingredients
- 10 –12 lbs 4.5–5.5 kg unripe apples (enough to yield about 1 gallon / 3.8 L of juice)
- 1 –2 cups 200–400 g granulated sugar (adjust to taste & tartness of apples)
- 1 Tbsp lemon juice optional, for brightness
- 1 packet cider yeast or wine yeast or ½ packet if using a small batch
- Filtered water only if needed to top up to 1 gallon
Instructions
- Prep the Apples: Wash and chop apples, discarding bruised/rotten bits. Keep skins & cores for flavor.
- Extract Juice: Press, juice, or blend and strain apples. Collect enough juice for about 1 gallon.
- Sweeten the Juice: Stir in 1 cup sugar first, taste, then add up to 2 cups total if you want sweeter, higher-alcohol cider. Add 1 Tbsp lemon juice if desired.
- Add Yeast: Sprinkle 1 packet yeast (or half for 1 gallon) over juice. Stir gently.
- Fermentation: Fit jar with airlock. Ferment 7–14 days at room temp (65–70°F / 18–21°C).
- Secondary Ferment: Siphon into a clean jar, leaving sediment behind. Ferment another 2–3 weeks.
- Bottling: For sparkling cider: add ½ tsp sugar per bottle before sealing.
- Store bottles in a cool dark place for at least 1 week (2–4 weeks improves flavor).
- Serve: Chill, pour into a glass, and enjoy your crisp homemade cider!
One-Pot Cooking Rocks!

Michelle
Hi, I’m Michelle, the founder, owner, author, and editor of OvenSpot. My passion for one-pot cooking commenced when I was working to prepare cafeteria lunches for school students. I am now on a mission to assist you in choosing the cooking pot or appliance you will use daily. As well as in-depth information to assist you in using and caring for your cookware and appliances. Along with the yummy recipes I use at home.
Questions? Reach out to Michelle at [email protected]