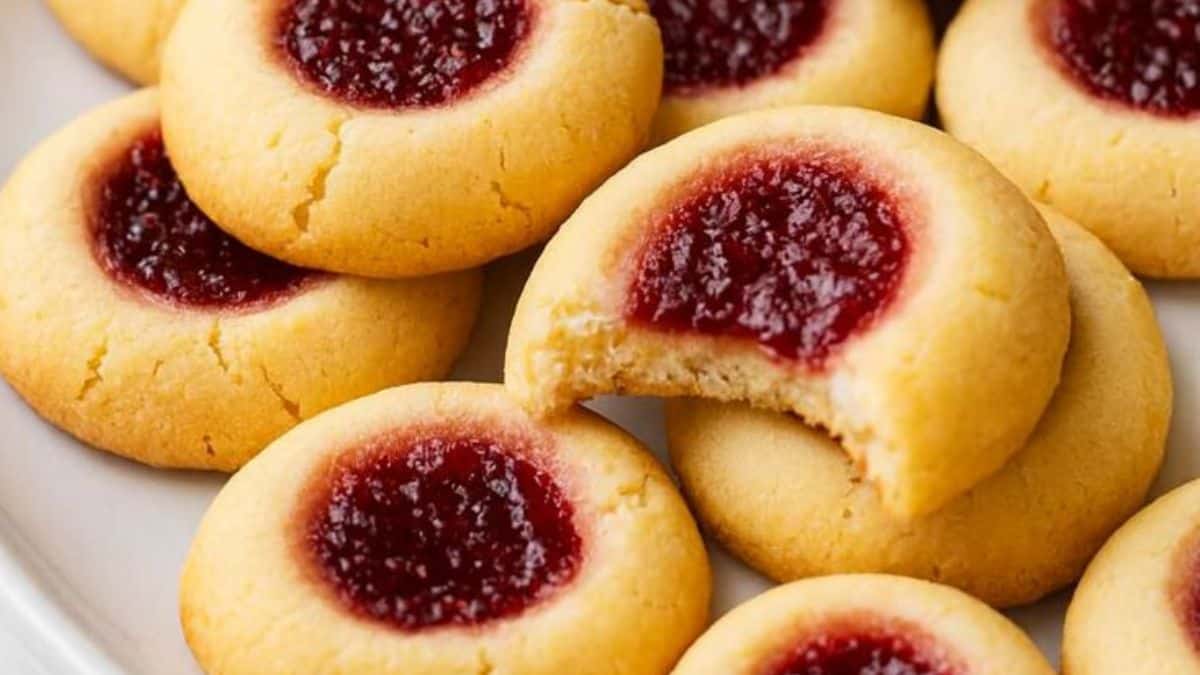
Classic Jam Thumbprints: Melt-in-Your-Mouth Cookies
These Jam Thumbprints are a true holiday classic in our kitchen. The buttery shortbread base paired with that little dollop of fruity jam in the center is just irresistible. Whether you go for raspberry, apricot, or even strawberry, each bite is the perfect balance of sweet and rich.
I make these every year as part of our cookie tins for friends and family they’re one of the first to disappear! What I love most is how simple and fun they are to make, especially with little ones helping press the “thumbprint” into each cookie. You don’t need any fancy equipment or complicated techniques here just wholesome ingredients and a bit of holiday spirit.
Why You’ll Love Jam Thumbprints
These cookies are buttery, tender, and not too sweet just right. They’re versatile and timeless, perfect for holiday trays, cookie exchanges, or an afternoon baking session with the kids. The jam adds a pop of color and flavor, and you can change it up depending on what you have on hand. They’re also make-ahead friendly, which is a huge win during the busy season.
Simple Ingredients
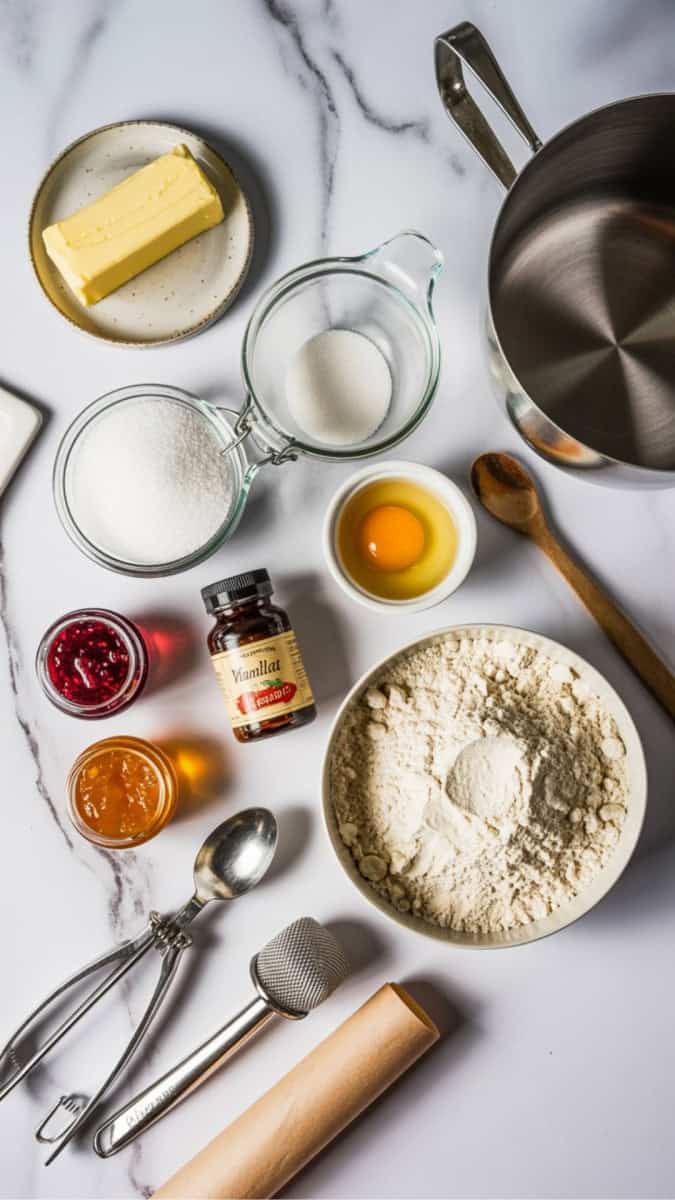
These cookies are made with pantry staples, and each one plays a big role in the flavor and texture.
- Unsalted butter: The foundation of the cookie, butter makes these soft and rich with a tender crumb.
- Granulated sugar: Sweetens the dough just enough and helps the cookies get that lightly golden edge.
- Egg yolk: Adds richness and helps bind the dough together.
- Vanilla extract: Gives the cookies that warm, comforting flavor that’s perfect for the holidays.
- All-purpose flour: Just the right flour for a sturdy but melt-in-your-mouth shortbread.
- Jam or preserves: Raspberry and apricot are traditional, but any jam works. It adds sweetness and beautiful color.
Yields and Timing
- Servings: 24 cookies
- Prep Time: 15 minutes
- Chill Time: 30 minutes
- Cook Time: 12 minutes
- Total Time: 57 minutes
What is Needed
- 1 cup unsalted butter, softened
- ½ cup granulated sugar
- 1 egg yolk
- 1 teaspoon vanilla extract
- 2 cups all-purpose flour
- ½ cup jam or preserves (raspberry, apricot, or strawberry)
Instructions
- Preheat your oven to 350°F (175°C). Line a baking sheet with parchment paper.
- In a large bowl, cream the butter and sugar together until light and fluffy.
- Add the egg yolk and vanilla extract, mixing until fully combined.
- Gradually stir in the flour until a soft dough forms.
- Scoop 1-inch balls of dough and roll them between your palms.
- Place on the prepared baking sheet, spacing them about 2 inches apart.
- Use your thumb or the back of a small spoon to gently press an indentation into the center of each ball.
- Fill each indentation with about ½ teaspoon of jam.
- Chill the filled cookies in the fridge for 30 minutes to help them hold their shape.
- Bake for 12–14 minutes, or until the edges are just beginning to turn golden.
- Cool on the baking sheet for 5 minutes, then transfer to a wire rack to cool completely.
Top Tips
- Chill the dough after shaping. This prevents the cookies from spreading too much.
- Don’t overfill the jam. A little goes a long way, and it can bubble over if too full.
- Use different jams in one batch. Kids love picking their favorite flavor!
- Make a double batch. These freeze well and are great for gifting.
- Try pressing with a small measuring spoon. It makes perfectly round centers without getting sticky.
Recipe Variations
- Use almond or lemon extract instead of vanilla for a new flavor twist.
- Add finely chopped nuts to the dough for extra texture.
- Swap in chocolate spread or caramel instead of jam for something extra indulgent.
- Make them gluten-free with a 1:1 gluten-free flour blend.
Recommended Equipment
- Mixing bowls
- Hand mixer or stand mixer
- Small cookie scoop
- Parchment paper
- Baking sheet
- Cooling rack
- Measuring cups and spoons
Make Ahead Tips
Make the dough up to 2 days in advance and refrigerate. You can also freeze the shaped cookies before baking just add jam right before they go into the oven.
How to Store and Reheat
Store cookies in an airtight container at room temperature for up to 5 days. To freeze, layer with parchment paper in a freezer-safe container for up to 3 months. Thaw at room temp. No reheating needed!
What To Serve With This Recipe
Jam thumbprints go perfectly with a hot cup of tea or coffee, or as part of a festive cookie platter alongside snowballs, sugar cookies, and gingerbread.
What You Need to Know About This Recipe
Jam thumbprints originated from Swedish and Eastern European baking traditions, often featured during Christmas as a colorful and fruity cookie. The name “thumbprint” comes from the way the center is traditionally pressed using your thumb! These cookies are a beloved staple at holiday tables, and for good reason: they’re simple, versatile, and always a crowd-pleaser.
More Christmas Cookies
If you love these cookies you must try these forgotten Christmas Cookies.
Jam Thumbprints
Equipment
- Mixing bowls
- Hand mixer or stand mixer
- Small cookie scoop
- Parchment paper
- Baking sheet
- Cooling rack
- Measuring cups and spoons
Ingredients
- 1 cup unsalted butter softened
- ½ cup granulated sugar
- 1 egg yolk
- 1 teaspoon vanilla extract
- 2 cups all-purpose flour
- ½ cup jam or preserves raspberry, apricot, or strawberry
Instructions
- Preheat your oven to 350°F (175°C). Line a baking sheet with parchment paper.
- In a large bowl, cream the butter and sugar together until light and fluffy.
- Add the egg yolk and vanilla extract, mixing until fully combined.
- Gradually stir in the flour until a soft dough forms.
- Scoop 1-inch balls of dough and roll them between your palms.
- Place on the prepared baking sheet, spacing them about 2 inches apart.
- Use your thumb or the back of a small spoon to gently press an indentation into the center of each ball.
- Fill each indentation with about ½ teaspoon of jam.
- Chill the filled cookies in the fridge for 30 minutes to help them hold their shape.
- Bake for 12–14 minutes, or until the edges are just beginning to turn golden.
- Cool on the baking sheet for 5 minutes, then transfer to a wire rack to cool completely.
Notes
- Don’t skip chilling the shaped cookies it’s the key to keeping that neat little jam center.
- If jam is too thick, warm it slightly before spooning into the cookies.

Michelle
Hi, I’m Michelle, the founder, owner, author, and editor of OvenSpot. My passion for one-pot cooking commenced when I was working to prepare cafeteria lunches for school students. I am now on a mission to assist you in choosing the cooking pot or appliance you will use daily. As well as in-depth information to assist you in using and caring for your cookware and appliances. Along with the yummy recipes I use at home.
Questions? Reach out to Michelle at [email protected]