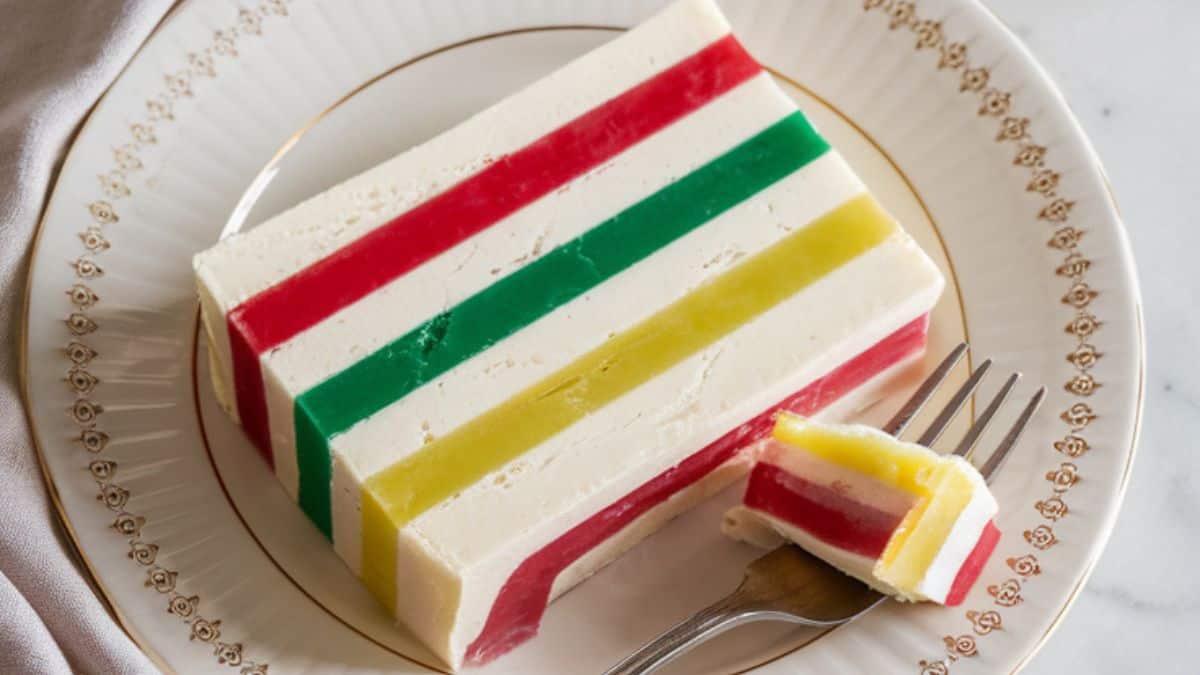
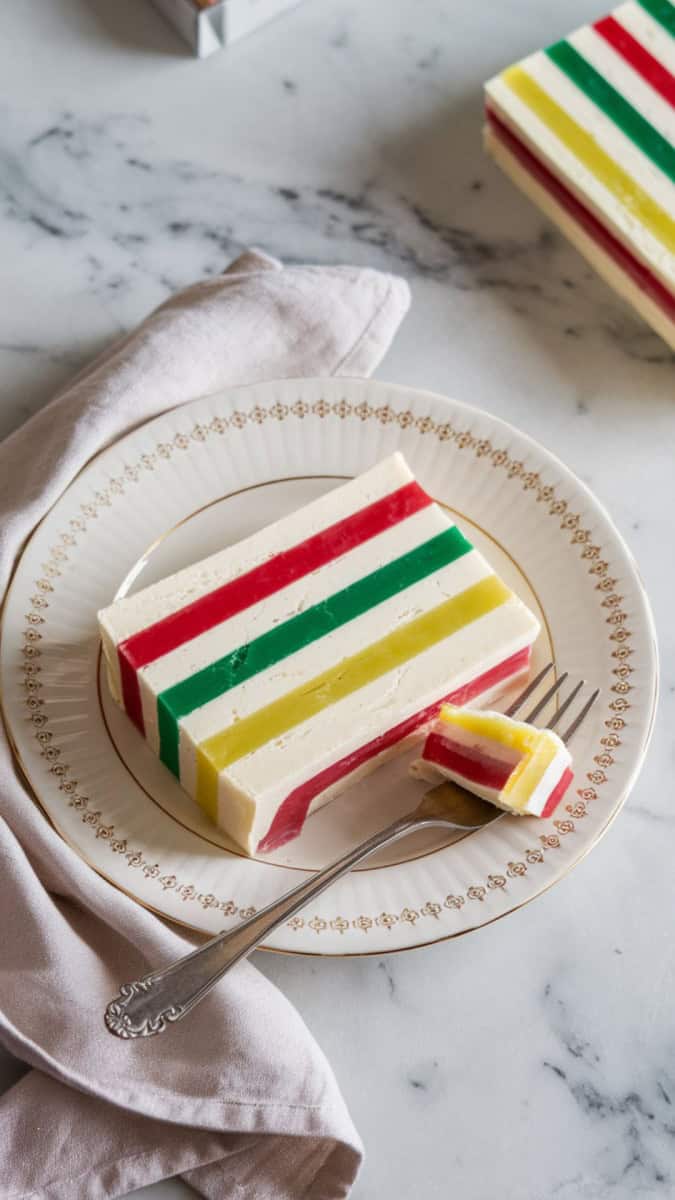
Layered Ribbon Jello Salad: A Retro Classic with a Modern Twist
Ribbon jello salad is as fun to make as it is to eat! With its stunning layers of colorful gelatin and creamy filling, it’s a classic that’s perfect for potlucks, holiday dinners, or just to surprise your kids with something special.
I’ve made this dozens of times for family gatherings, and it never fails to bring smiles and second helpings. The best part? You can customize it with your favorite gelatin flavors to match any season or celebration. Let’s walk through this vibrant, jiggly masterpiece together!
Why You’ll Love This Ribbon Jello Salad
Ribbon Gelatin Salad isn’t just a treat for the eyes it’s a sweet, creamy, and fruity dessert that’s surprisingly simple to make. Kids love the jiggly texture and colors, while adults appreciate the nostalgic charm. It’s also a great make-ahead dessert that’s guaranteed to impress at any gathering.
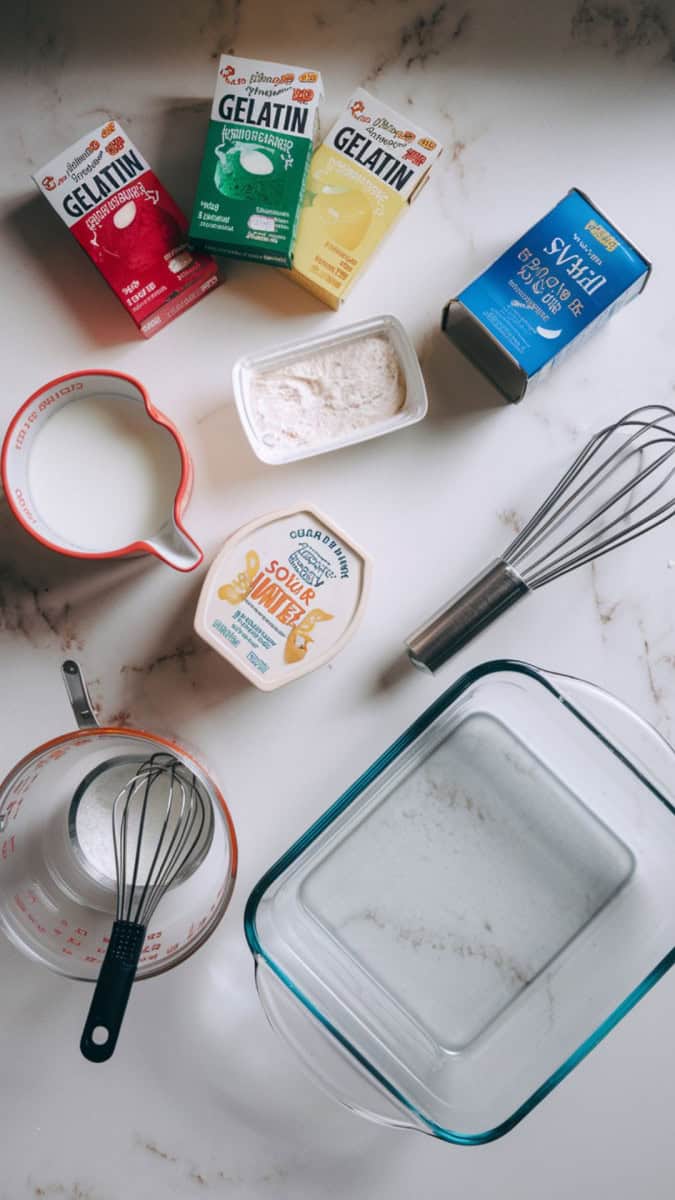
Simple Ingredients
Here’s what makes up this classic ribbon salad easy-to-find and fun to layer!
- Flavored Gelatin (red, green, yellow, etc.): These create the vibrant layers of color and flavor think cherry, lime, lemon, or strawberry!
- Unflavored Gelatin: This helps the creamy middle layer set perfectly and gives it that signature structure.
- Sweetened Condensed Milk: Adds a creamy sweetness and helps create the luscious white layer between colors.
- Sour Cream or Greek Yogurt: This balances the sweetness and gives a tangy richness to the creamy layer.
- Water (boiling and cold): Essential for dissolving and setting each gelatin layer.
Recommended Equipment
- 9×13 inch glass baking dish
- Mixing bowls
- Whisk
- Measuring cups
- Ladle or spoon
- Rubber spatula
Servings, Prep & Cook Time
- Servings: 12
- Preparation Time: 30 minutes (plus chilling)
- Chill Time (per layer): 30 minutes
- Total Time: About 4–5 hours (including chill time)
What is Needed
- 3 packages (3 oz each) flavored gelatin (e.g. cherry, lime, lemon)
- 2 packets unflavored gelatin
- 1 can (14 oz) sweetened condensed milk
- 1 cup sour cream or Greek yogurt
- 4 ½ cups boiling water
- 2 cups cold water
How to Make Ribbon Gelatin Salad
- Dissolve one package of flavored gelatin in 1 cup of boiling water. Add ½ cup of cold water. Pour into a 9×13 dish and refrigerate until set (about 30 minutes).
- In a separate bowl, dissolve 2 packets of unflavored gelatin in ½ cup cold water. Let sit for 5 minutes. Add 1 cup boiling water, then whisk in the sweetened condensed milk and sour cream. Let cool to room temperature.
- Once the first colored layer is fully set, gently pour about 1 cup of the creamy mixture over it. Chill for another 30 minutes.
- Repeat the process with remaining flavored gelatins and alternating creamy layers. Always ensure each layer is set before pouring the next.
- Once all layers are added, refrigerate for at least 2 hours or until fully firm. Slice and serve cold.
Top Tips
- Always let each layer set fully before adding the next to avoid color mixing.
- Use a ladle or spoon to gently add layers to reduce bubbles and splashes.
- Don’t rush chill times are key to beautiful layers.
- Make this the night before for easier prep and perfect texture.
- Let the creamy layer cool to room temp before pouring to avoid melting the layer below.
How to Get Clean Layers Every Time (Enhanced Tip)
Layering gelatin can be tricky, but here’s a trick: use the back of a spoon when pouring each new layer. Gently pour the mixture over the spoon to soften the fall and reduce mixing. You can even tilt the dish slightly and pour slowly for better control.
How to Cut for a Crowd (Unique Serving Suggestion)
Instead of slicing like bars, use a small round biscuit cutter or mini cookie cutters to make fun shapes for kids’ lunchboxes or party trays. It turns a simple dessert into an extra special treat!
Recipe Variations
- Use sugar-free gelatin for a lighter version.
- Add fruit pieces like strawberries or pineapple between layers.
- Swap sour cream for Greek yogurt for extra protein.
- Use pastel gelatin for a spring-themed version.
Holiday Color Combos (New Tip Section)
Want to make this seasonal? Try these combos:
- Christmas: Red (cherry), white (cream layer), green (lime)
- Easter: Yellow (lemon), white, pastel purple or pink (grape/strawberry)
- Fourth of July: Red (strawberry), white, blue (berry blue)
- Halloween: Orange (orange), white, purple (grape)
Make Ahead Tips
This is the ultimate make-ahead dessert! Prepare the entire salad the night before and keep it chilled until serving.
How to Store and Reheat
- Store: Cover tightly with plastic wrap and refrigerate for up to 5 days.
- Reheat: No reheating needed serve chilled directly from the fridge.
What To Serve With This Recipe
- Grilled chicken or ham
- BBQ dishes
- Fresh fruit platters
- Vanilla bean ice cream on the side for extra indulgence
Forgotten Thanksgiving sides you’ll wish you tried sooner!
What You Need to Know About This Recipe
Ribbon jello salad originated in mid-century America, a time when Jell-O was a household staple and layered desserts were centerpieces at parties and potlucks. Known for its eye-catching colors, creamy texture, and make-ahead convenience, this dish quickly became a family favorite.
While not exclusive to Amish cuisine, ribbon gelatin salad found a special place in many Amish and Mennonite community cookbooks particularly those reflecting the cherished “church cookbook” traditions. Its simple ingredients, nostalgic charm, and beautiful presentation have helped it stand the test of time, making it a beloved treat across generations and communities.
More Christmas Recipes
Try these you will love them!

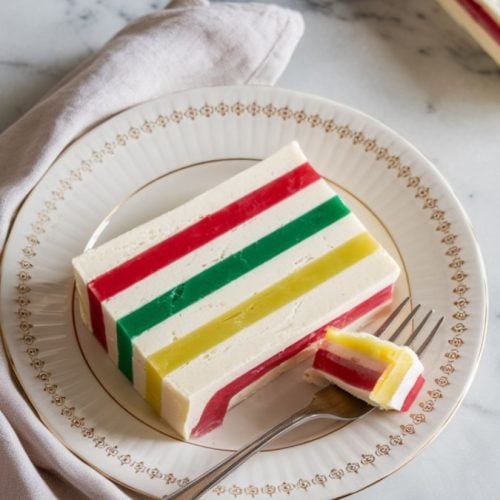
Ribbon Gelatin Salad
Equipment
- 9×13 inch glass baking dish
- Mixing bowls
- Whisk
- Measuring cups
- Ladle or spoon
- Rubber spatula
Ingredients
- 3 packages 3 oz each flavored gelatin (e.g. cherry, lime, lemon)
- 2 packets unflavored gelatin
- 1 can 14 oz sweetened condensed milk
- 1 cup sour cream or Greek yogurt
- 4 ½ cups boiling water
- 2 cups cold water
Instructions
- Prepare the first gelatin layer (e.g. cherry): Dissolve one package of flavored gelatin in 1 cup of boiling water. Add ½ cup of cold water. Pour into a 9×13 dish and refrigerate until set (about 30 minutes).
- Make the creamy layer: In a separate bowl, dissolve 2 packets of unflavored gelatin in ½ cup cold water. Let sit for 5 minutes. Add 1 cup boiling water, then whisk in the sweetened condensed milk and sour cream. Let cool to room temperature.
- Add first creamy layer: Once the first colored layer is fully set, gently pour about 1 cup of the creamy mixture over it. Chill for another 30 minutes.
- Repeat layering: Repeat the process with remaining flavored gelatins and alternating creamy layers. Always ensure each layer is set before pouring the next.
- Chill completely: Once all layers are added, refrigerate for at least 2 hours or until fully firm. Slice and serve cold.
Notes
One-Pot Cooking Rocks!

Michelle
Hi, I’m Michelle, the founder, owner, author, and editor of OvenSpot. My passion for one-pot cooking commenced when I was working to prepare cafeteria lunches for school students. I am now on a mission to assist you in choosing the cooking pot or appliance you will use daily. As well as in-depth information to assist you in using and caring for your cookware and appliances. Along with the yummy recipes I use at home.
Questions? Reach out to Michelle at [email protected]