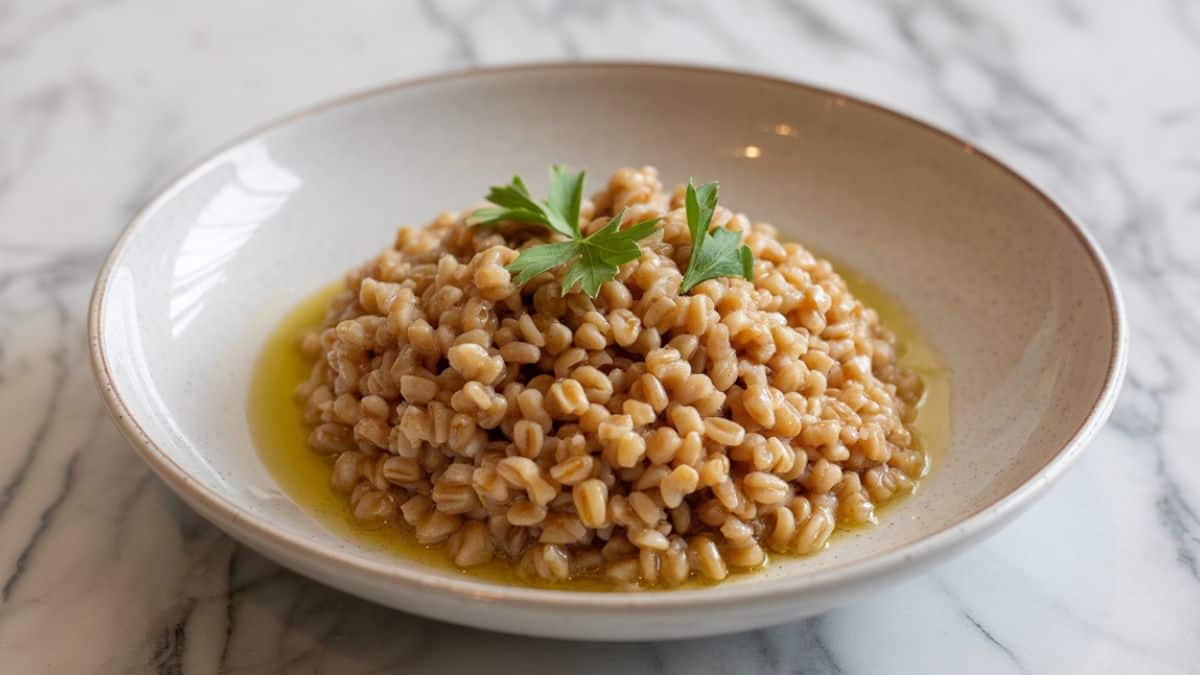
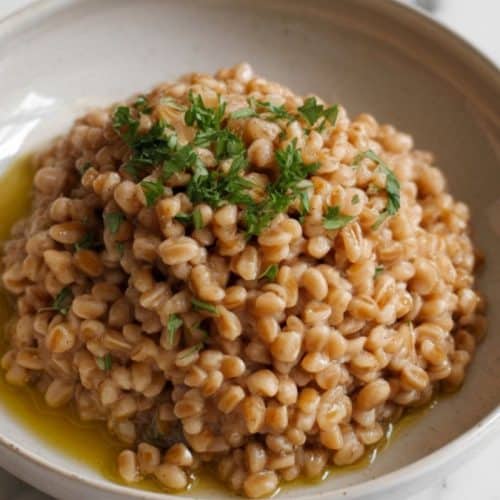
Fluffy, Perfect Farro in a Rice Cooker: So Easy!
If you’ve never made farro in a rice cooker, you’re in for a treat. This is one of those simple, healthy kitchen hacks that instantly makes your week easier. Farro is hearty, nutty, and satisfying perfect as a base for bowls, tossed into salads, or served alongside roasted meats.
Instead of babysitting it on the stovetop, we’re letting the rice cooker do all the work. I’ve been making this for quick weekday lunches and my kids love the chewy texture. Bonus: it’s just one step and done!
Why You’ll Love Farro in a Rice Cooker
Farro is a nutritious ancient grain with a naturally nutty flavor and slightly chewy texture that makes it satisfying in a way white rice just isn’t. Cooking it in a rice cooker means zero guesswork no stirring, no boiling over, no overcooked grains. It’s ideal for meal prep, quick dinners, or adding to school lunches. Plus, it’s a great high-fiber, plant-based option the whole family can enjoy.
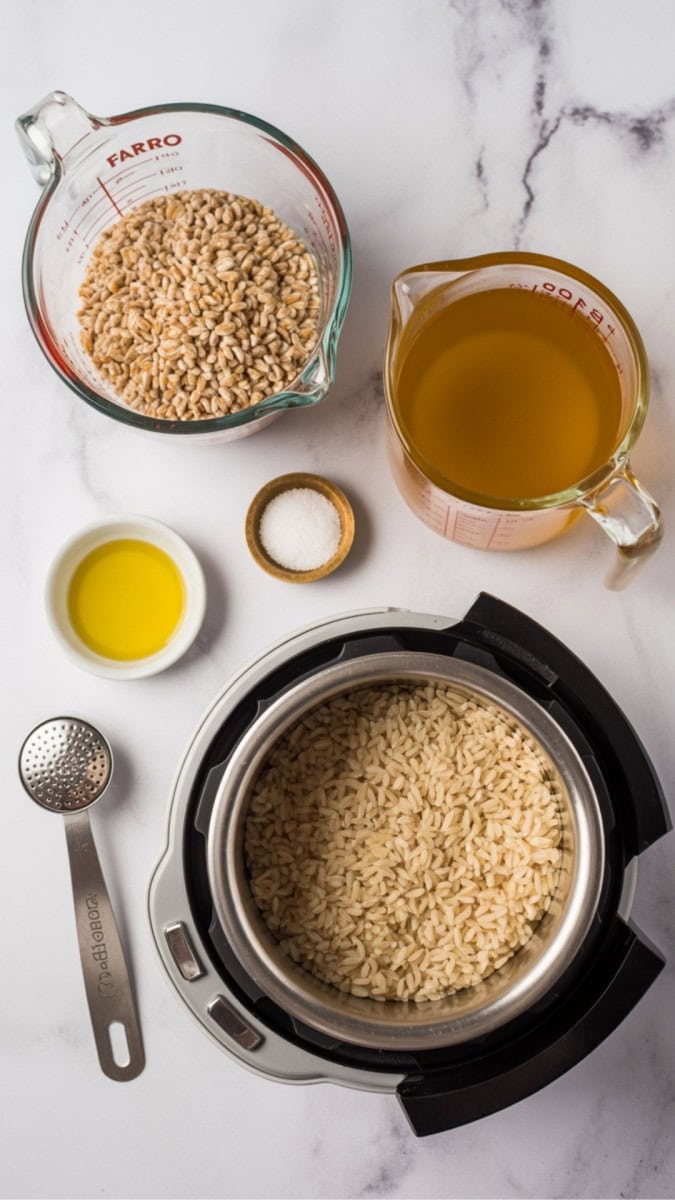
Simple Ingredients
Here’s what you’ll need for this basic farro recipe just a few pantry staples:
- Farro: We’re using pearled farro, which cooks faster and is the most common variety found in stores.
- Water or Broth: Water works just fine, but broth adds a savory, deeper flavor to the farro.
- Olive Oil (Optional): A splash of olive oil keeps the grains from sticking and enhances the taste slightly.
- Salt: Just a pinch helps bring out the farro’s naturally nutty flavor.
Recommended Equipment
- Rice Cooker (with brown rice or whole grain setting)
- Fine Mesh Strainer
- Measuring Cups and Spoons
- Rice Paddle or Fork
Servings, Prep & Cooking Time
- Servings: 4
- Prep Time: 2 minutes
- Cook Time: 45 minutes
- Total Time: 47 minutes

What is Needed
- 1 cup pearled farro
- 2 ½ cups water or broth
- 1 tablespoon olive oil (optional)
- ½ teaspoon salt
Instructions
- Rinse the farro in a fine mesh strainer under cool running water to remove excess starch.
- Place the rinsed farro in the rice cooker along with the water or broth, olive oil (if using), and salt.
- Select the “Brown Rice” or similar whole grain setting. If your rice cooker doesn’t have a brown rice option, use the regular setting and check around the 40-minute mark.
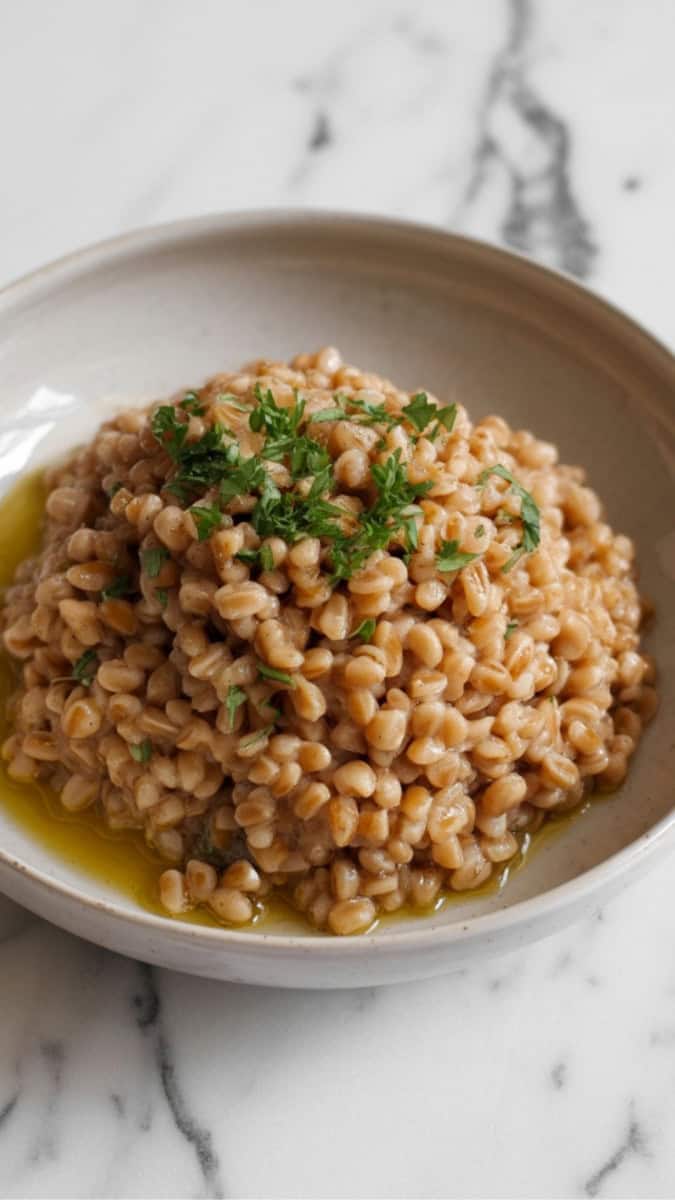
- Once the cycle is complete, let the farro sit in the rice cooker with the lid on for 5–10 minutes to absorb any remaining liquid.
- Use a rice paddle or fork to fluff the farro. Serve warm or cool completely for meal prep.
Top Tips
- Use Pearled Farro: It cooks more quickly and is the most rice-cooker-friendly variety. Whole farro needs soaking and longer cook time.
- Add Flavors: Toss in a bay leaf or a smashed garlic clove to flavor the cooking water.
- Don’t Skip the Rinse: Rinsing helps prevent gummy texture.
- Meal Prep Friendly: Double the recipe and store extra in the fridge it reheats beautifully.
- Kid-Friendly Tip: Mix cooked farro into mac and cheese or use it in taco bowls for a nutritious upgrade.
Recipe Variations
- Lemon Herb Farro: Add lemon zest, chopped parsley, and a drizzle of olive oil after cooking.
- Cheesy Farro: Stir in grated Parmesan and black pepper for a risotto-style vibe.
- Vegetable Farro: Mix in sautéed spinach, mushrooms, or roasted veggies post-cook.
- Farro Pilaf: Swap water for chicken broth and add sautéed onions and carrots before cooking.
Make Ahead Tips
Cooked farro keeps well in the fridge for up to 5 days. You can also freeze it in individual portions just reheat with a splash of water.
How to Store and Reheat
- Store: Cool completely and store in an airtight container in the fridge.
- Freeze: Scoop into freezer bags or silicone molds, flatten, and freeze for up to 3 months.
- Reheat: Microwave with a splash of water or heat in a skillet until warm.
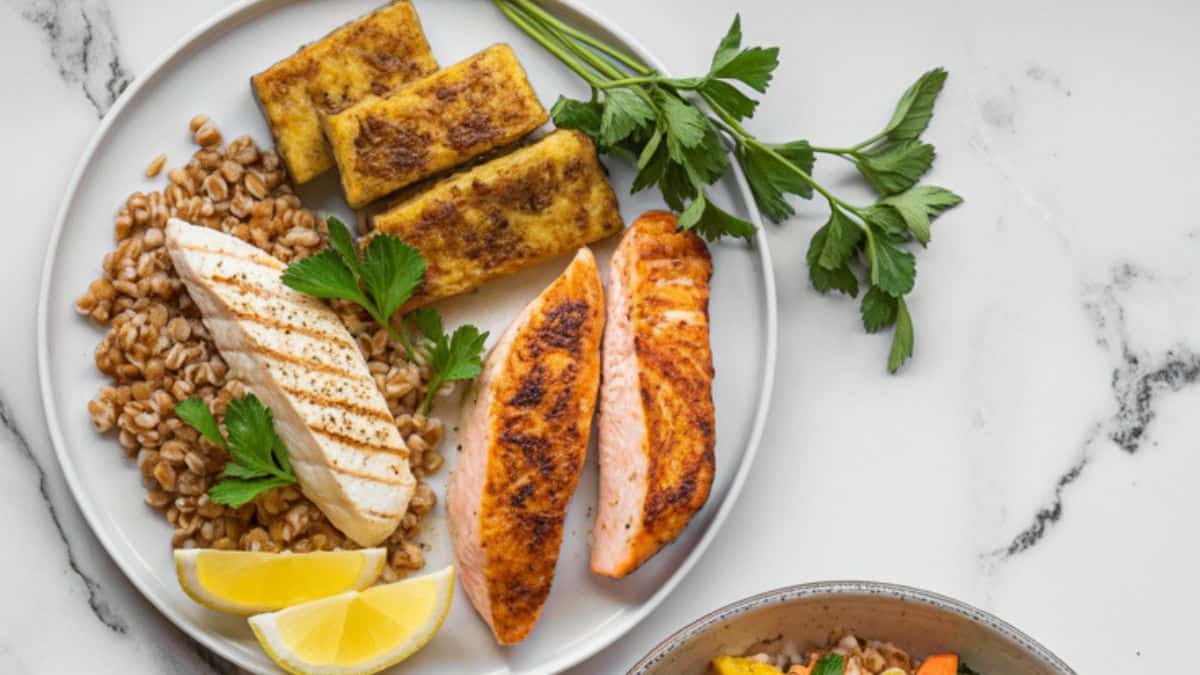
What to Serve With This Recipe
This trio-style plate is a simple and nutritious way to serve farro alongside your favorite proteins. Whether you’re in the mood for a power salad bowl, juicy grilled chicken, flaky seared salmon, or crispy golden tofu, these meal delivers big flavor with minimal fuss. It’s a flexible, family-friendly option that’s perfect for mixing and matching!
Grilled chicken, salmon, or tofu with Farro
Ingredients List
For the Farro Base (Serves 3–4):
- 1 cup cooked pearled farro (prepared using rice cooker or stovetop method)
- 1 tablespoon olive oil
- 1 tablespoon chopped parsley
- Salt and pepper to taste
Protein Options (Choose One or Prep All for a Variety Plate):
Grilled Chicken
- 1 boneless, skinless chicken breast
- 1 teaspoon olive oil
- ½ teaspoon garlic powder
- ½ teaspoon smoked paprika
- Salt and black pepper to taste
- Lemon wedges (for serving)
Seared Salmon
- 1 salmon fillet, skin on
- 1 teaspoon olive oil
- Salt and black pepper to taste
- Lemon slices (for garnish)
Pan-Seared Tofu
- ½ block extra-firm tofu, pressed and sliced into 3 pieces
- 1 teaspoon olive oil
- 1 teaspoon low-sodium soy sauce
- ½ teaspoon garlic powder
- Optional: drizzle of sesame oil after cooking
Instructions
Step 1: Prepare Farro
- If not already done, cook the farro using your rice cooker or stovetop (use 1 cup pearled farro + 2½ cups water or broth).
- Once cooked, fluff with a fork and stir in olive oil, parsley, salt, and pepper. Set aside.
Step 2: Cook Your Protein
For Grilled Chicken:
- Preheat a grill or grill pan over medium-high heat.
- Rub the chicken breast with olive oil, garlic powder, paprika, salt, and pepper.
- Grill for 5–6 minutes per side until cooked through (internal temp 165°F).
- Rest for 5 minutes, then slice against the grain.
For Seared Salmon:
- Pat salmon dry and season with salt and pepper.
- Heat olive oil in a skillet over medium-high heat.
- Place salmon skin-side down and cook 4–5 minutes, then flip and cook another 2–3 minutes until opaque and flaky.
- Garnish with lemon slices.
For Pan-Seared Tofu:
- Pat tofu slices dry after pressing.
- Heat olive oil in a nonstick or cast iron skillet over medium heat.
- Add tofu slices and cook 3–4 minutes per side until golden.
- In the last minute of cooking, drizzle with soy sauce. Optional: finish with a few drops of sesame oil.
Step 3: Assemble Plate
- Scoop a portion of farro onto one side of a white plate.
- Add your choice of protein (or all three!) in separate sections next to the farro.
- Garnish with lemon slices, parsley, and a drizzle of olive oil.
- Serve warm and enjoy!
Roasted Vegetables with Farro
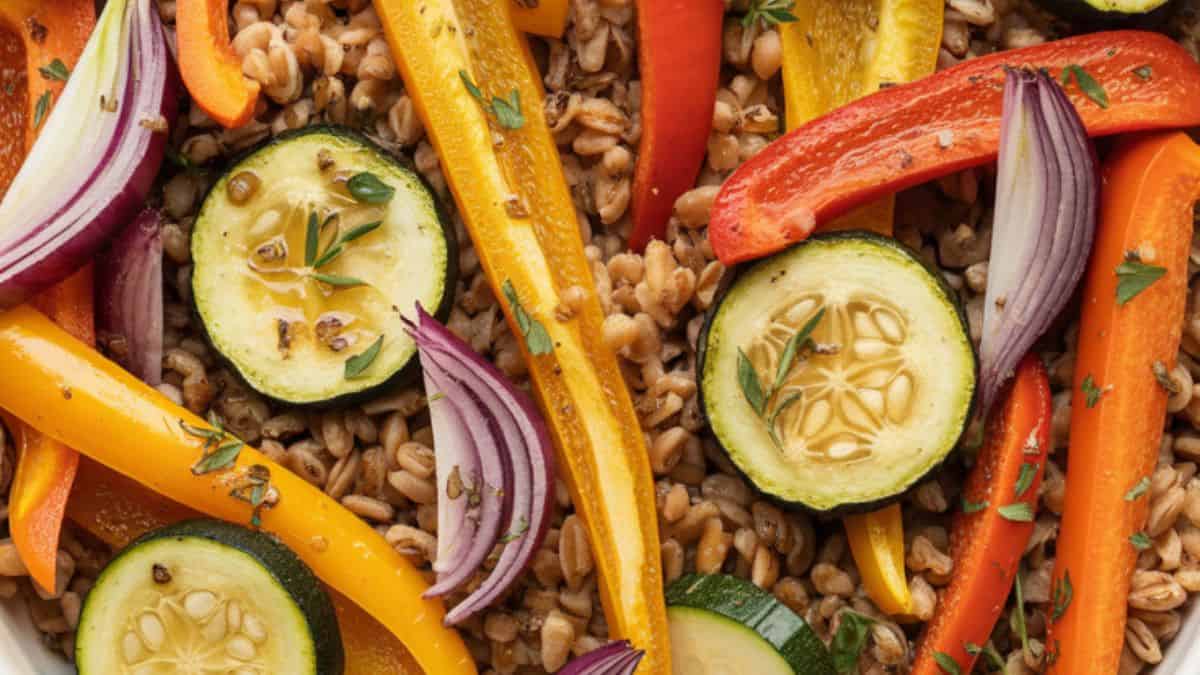
This colorful medley of roasted vegetables brings out deep, caramelized flavors that pair perfectly with farro’s nutty chew. It’s a warm, comforting dish that’s as nourishing as it is beautiful perfect as a main or hearty side.
Ingredients List
For the Farro Base:
- 1 cup cooked pearled farro
- 1 tablespoon olive oil
- 1 tablespoon chopped fresh parsley or basil
- Salt and pepper to taste
For the Roasted Vegetables:
- 1 large carrot, sliced into thin rounds
- 1 red bell pepper, sliced
- 1 yellow bell pepper, sliced
- 1 zucchini, sliced into half moons
- ½ red onion, cut into wedges
- 2 tablespoons olive oil
- 1 teaspoon dried Italian herbs or thyme
- Salt and black pepper to taste
Instructions
Step 1: Roast the Vegetables
- Preheat your oven to 425°F (220°C).
- Add the carrots, bell peppers, zucchini, and red onion to a large bowl. Drizzle with olive oil, sprinkle with herbs, salt, and pepper, then toss to coat evenly.
- Spread the vegetables in a single layer on a parchment-lined baking sheet.
- Roast for 20–25 minutes, flipping halfway, until tender and slightly charred on the edges.
Step 2: Prepare the Farro
- Cook the farro if you haven’t already (use 1 cup pearled farro + 2½ cups water or broth in a rice cooker or on stovetop).
- Once cooked, fluff with a fork and stir in olive oil, chopped parsley, salt, and pepper.
Step 3: Assemble the Bowl
- In a shallow bowl, combine the warm farro and roasted vegetables.
- Drizzle with a touch more olive oil and finish with extra herbs if desired.
- Serve warm, at room temperature, or chilled this dish works beautifully all ways!
Roasted Vegetables with Farro
This colorful medley of roasted vegetables brings out deep, caramelized flavors that pair perfectly with farro’s nutty chew. It’s a warm, comforting dish that’s as nourishing as it is beautiful perfect as a main or hearty side.
Ingredients List
For the Soup Base:
- 1 tablespoon olive oil
- 1 small yellow onion, diced
- 2 garlic cloves, minced
- 2 carrots, sliced
- 1 cup cherry tomatoes, halved (or 1 can diced tomatoes, drained)
- 4 cups vegetable broth
- 2 cups chopped kale or spinach
- 1 teaspoon Italian seasoning
- Salt and black pepper to taste
For the Farro:
- 1 cup cooked pearled farro (pre-cooked separately or added directly if uncooked – see note below)
Instructions
Step 1: Sauté the Vegetables
- In a large pot or Dutch oven, heat the olive oil over medium heat.
- Add diced onion and cook for 3–4 minutes until softened.
- Stir in garlic and cook for another 30 seconds until fragrant.
- Add sliced carrots and halved cherry tomatoes. Cook for 4–5 minutes, stirring occasionally.
Step 2: Add Broth and Seasonings
- Pour in vegetable broth and add Italian seasoning, salt, and pepper.
- Bring the soup to a boil, then reduce heat and let it simmer uncovered for 15–20 minutes until carrots are tender.
Step 3: Add Greens and Farro
Option A (Pre-cooked Farro):
- Stir in cooked farro and chopped kale or spinach. Simmer for 5–7 more minutes until greens are wilted and farro is heated through.
Option B (Uncooked Farro):
- Add ½ cup uncooked pearled farro with the broth in Step 2. Increase broth by 1 cup and simmer the soup for 30–35 minutes until farro is tender.
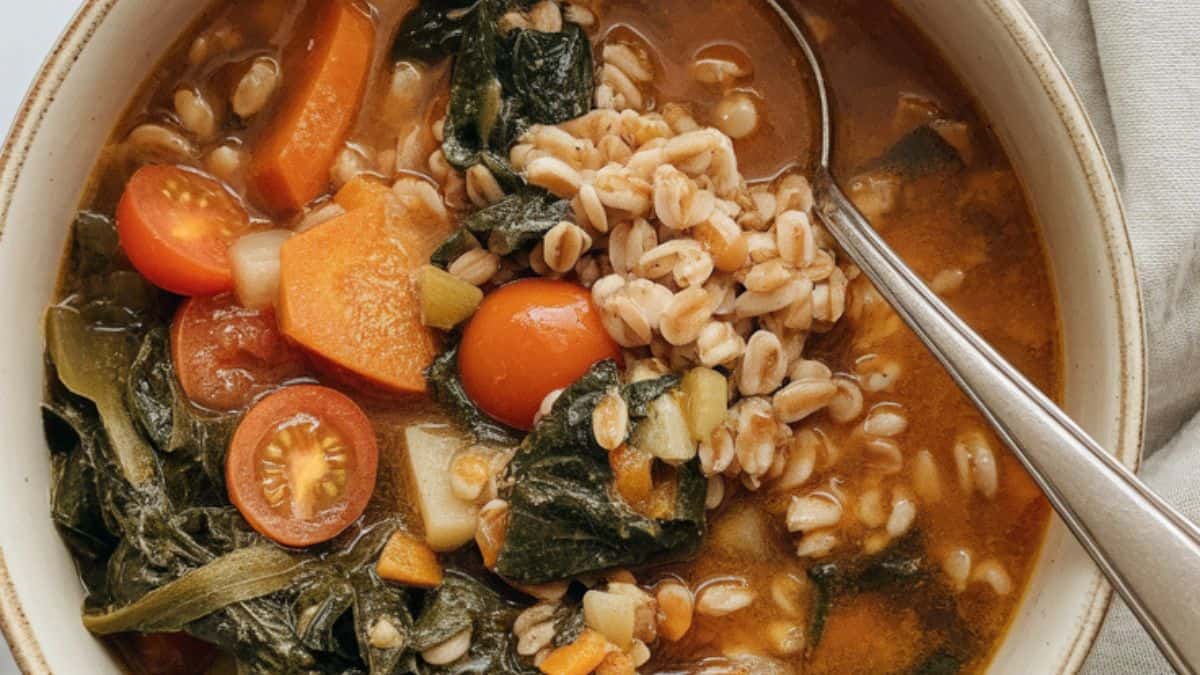
Step 4: Serve
- Ladle soup into bowls while hot.
- Serve with a slice of crusty bread, a sprinkle of Parmesan (optional), or a drizzle of olive oil.
- Enjoy warm and cozy!
More Rice Cooker Recipes
Try these you will love them!


Farro in a Rice Cooker
Equipment
- Rice Cooker (with brown rice or whole grain setting)
- Fine Mesh Strainer
- Measuring cups and spoons
- Rice Paddle or Fork
Ingredients
- 1 cup pearled farro
- 2 ½ cups water or broth
- 1 tablespoon olive oil optional
- ½ teaspoon salt
Instructions
- Rinse the Farro: Rinse the farro in a fine mesh strainer under cool running water to remove excess starch.
- Add Ingredients to the Rice Cooker: Place the rinsed farro in the rice cooker along with the water or broth, olive oil (if using), and salt.
- Cook on Brown Rice Setting: Select the “Brown Rice” or similar whole grain setting. If your rice cooker doesn’t have a brown rice option, use the regular setting and check around the 40-minute mark.
- Let It Sit: Once the cycle is complete, let the farro sit in the rice cooker with the lid on for 5–10 minutes to absorb any remaining liquid.
- Fluff and Serve: Use a rice paddle or fork to fluff the farro. Serve warm or cool completely for meal prep.
Notes
One-Pot Cooking Rocks!

Michelle
Hi, I’m Michelle, the founder, owner, author, and editor of OvenSpot. My passion for one-pot cooking commenced when I was working to prepare cafeteria lunches for school students. I am now on a mission to assist you in choosing the cooking pot or appliance you will use daily. As well as in-depth information to assist you in using and caring for your cookware and appliances. Along with the yummy recipes I use at home.
Questions? Reach out to Michelle at [email protected]