Easy and Decadent Rice Cooker Chocolate Lava Cake
If you’ve never thought a rice cooker could deliver rich, molten-centered chocolate lava cake magic think again! This recipe is proof that you don’t need an oven or fancy equipment to create a luxurious dessert that oozes decadence. I’ve made this cake more times than I can count when the chocolate cravings hit and I need something indulgent yet super simple.
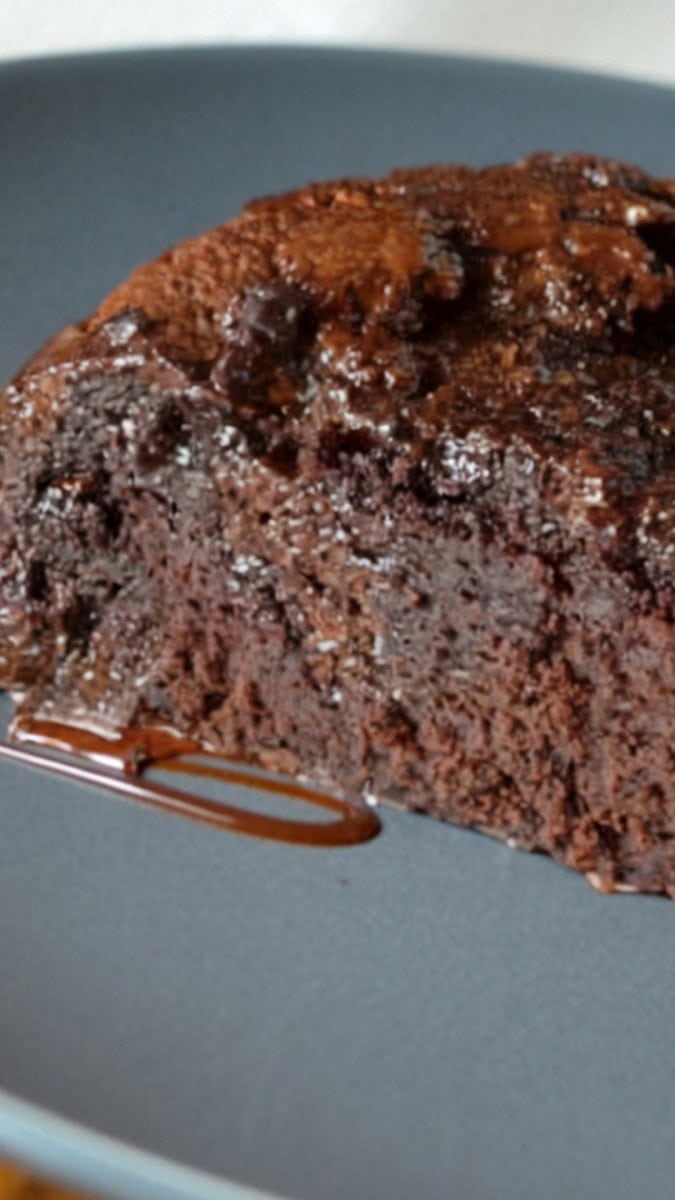
The outer layer is soft and cakey, while the center stays warm and gooey just the way a lava cake should be. It’s perfect for a cozy family dessert night or an impressive treat for guests that takes less than an hour from start to finish. Even better? Fewer dishes to clean, thanks to the rice cooker. Kids love cutting into the center and watching that warm chocolate flow out like a mini volcano!

Why You’ll Love This Dish
This chocolate lava cake checks all the boxes: easy, fast, and incredibly delicious. No oven is required, and the rice cooker handles the job effortlessly. It’s perfect for beginner bakers, great for last-minute desserts, and ideal for when you just want something rich and chocolatey without the fuss. The best part? That luscious, molten center that surprises you with every bite.
Simple Ingredients
Here’s all you need to make this rich chocolate dessert just pantry staples and a few simple mix-ins.
- All-purpose flour: Gives structure to the cake without making it too dense.
- Granulated sugar: Adds the perfect amount of sweetness to balance the cocoa.
- Unsweetened cocoa powder: Provides the deep chocolate flavor we all love.
- Baking powder: Helps the cake rise slightly while keeping the middle gooey.
- Salt: Enhances all the flavors and balances the sweetness.
- Melted butter: Adds richness and moisture to the cake.
- Eggs: Bind everything together and help with that lava-like texture.
- Vanilla extract: Brings warmth and aroma to complement the chocolate.
- Semi-sweet chocolate chips: Melt into the center to create that molten effect.
- Powdered sugar (optional): A light dusting for a pretty and sweet finish.
Recommended Equipment
- Rice cooker (standard or multi-function)
- Medium mixing bowl
- Silicone spatula
- Whisk
- Measuring cups and spoons
- Toothpick or cake tester
Recipe Timing & Servings
- Servings: 4
- Prep Time: 10 minutes
- Cook Time: 30 minutes
- Total Time: 40 minutes

Ingredients
- 1/2 cup all-purpose flour
- 1/2 cup granulated sugar
- 1/4 cup unsweetened cocoa powder
- 1/2 teaspoon baking powder
- 1/4 teaspoon salt
- 1/2 cup melted butter
- 2 large eggs
- 1 teaspoon vanilla extract
- 1/2 cup semi-sweet chocolate chips
- Powdered sugar for dusting (optional)
Instructions
- In a medium mixing bowl, whisk together flour, sugar, cocoa powder, baking powder, and salt. Add in the melted butter, eggs, and vanilla extract. Stir until the mixture is smooth and well combined. Fold in the chocolate chips.
- Lightly grease the rice cooker pot with butter or cooking spray. Pour the batter into the pot and smooth it out evenly with a spatula.
- Close the rice cooker lid and set it to the ‘Cook’ setting. Let it cook for 25–30 minutes, or until the edges are set but the center is still slightly soft.
- Insert a toothpick into the center. If it comes out with gooey chocolate, it’s ready. If it’s completely clean, it might be slightly overcooked (but still delicious!).
- Let the cake rest for 3–5 minutes before removing it. Carefully flip it out onto a plate or scoop out portions. Dust with powdered sugar and add berries or ice cream if desired.
Top Tips
- Grease well to prevent sticking rice cookers vary in nonstick quality.
- Don’t overmix the batter; fold until just combined to keep it tender.
- Use quality chocolate chips for the best gooey center.
- Serve immediately to enjoy the molten center at its best.
- Let kids help with mixing it’s a fun and mess-free baking project!
Recipe Variations
- Add a peanut butter swirl before cooking for a nutty twist.
- Try white chocolate chips for a creamy surprise inside.
- Make it spicy by adding a pinch of cayenne and cinnamon for a Mexican chocolate vibe.
- Serve in ramekins if you want individual portions using the rice cooker steaming rack.
Make Ahead Tips
- Mix the dry ingredients and store them in a jar to save time later.
- Batter can be made a few hours ahead and refrigerated just bring to room temperature before cooking.
How to Store and Reheat
- Store leftovers in an airtight container at room temperature for 1 day or refrigerate up to 3 days.
- Reheat in the microwave for 15–20 seconds to soften the center again.
What To Serve With This Recipe
- Fresh raspberries or strawberries
- A scoop of vanilla bean ice cream
- Whipped cream and a drizzle of chocolate or caramel sauce
- Mint leaves for garnish


Rice Cooker Chocolate Lava Cake
Equipment
- Rice cooker (standard or multi-function)
- Medium mixing bowl
- Silicone spatula
- Whisk
- Measuring cups and spoons
- Toothpick or cake tester
Ingredients
- 1/2 cup all-purpose flour
- 1/2 cup granulated sugar
- 1/4 cup unsweetened cocoa powder
- 1/2 teaspoon baking powder
- 1/4 teaspoon salt
- 1/2 cup melted butter
- 2 large eggs
- 1 teaspoon vanilla extract
- 1/2 cup semi-sweet chocolate chips
- Powdered sugar for dusting optional
- Butter or cooking spray for greasing rice cooker
Instructions
- In a medium mixing bowl, whisk together flour, sugar, cocoa powder, baking powder, and salt. Add in the melted butter, eggs, and vanilla extract. Stir until the mixture is smooth and well combined. Fold in the chocolate chips.
- Lightly grease the rice cooker pot with butter or cooking spray. Pour the batter into the pot and smooth it out evenly with a spatula.
- Close the rice cooker lid and set it to the ‘Cook’ setting. Let it cook for 25–30 minutes, or until the edges are set but the center is still slightly soft.
- Insert a toothpick into the center. If it comes out with gooey chocolate, it’s ready. If it’s completely clean, it might be slightly overcooked (but still delicious!).
- Let the cake rest for 3–5 minutes before removing it. Carefully flip it out onto a plate or scoop out portions. Dust with powdered sugar and add berries or ice cream if desired.
One-Pot Cooking Rocks!

Michelle
Hi, I’m Michelle, the founder, owner, author, and editor of OvenSpot. My passion for one-pot cooking commenced when I was working to prepare cafeteria lunches for school students. I am now on a mission to assist you in choosing the cooking pot or appliance you will use daily. As well as in-depth information to assist you in using and caring for your cookware and appliances. Along with the yummy recipes I use at home.
Questions? Reach out to Michelle at [email protected]