How to use a Dutch Oven While Camping
In this article, you will learn how to cook in a Dutch oven while camping.
To use a Dutch oven while camping, place it over coals or a campfire. Start by preheating it, then add your ingredients. Cover with the lid and place more coals on top for even heat. Check periodically and adjust the coals as needed to maintain a consistent temperature for your recipe.
By breaking the process down into simple steps, I am sure some confusion around using this fantastic traditional cookware will become more apparent.
You, too, will then be able to enjoy the many benefits of cooking in a traditional cast-iron Dutch oven. I will also cover some of those benefits below! Read on to learn about cooking with a Dutch oven while camping.
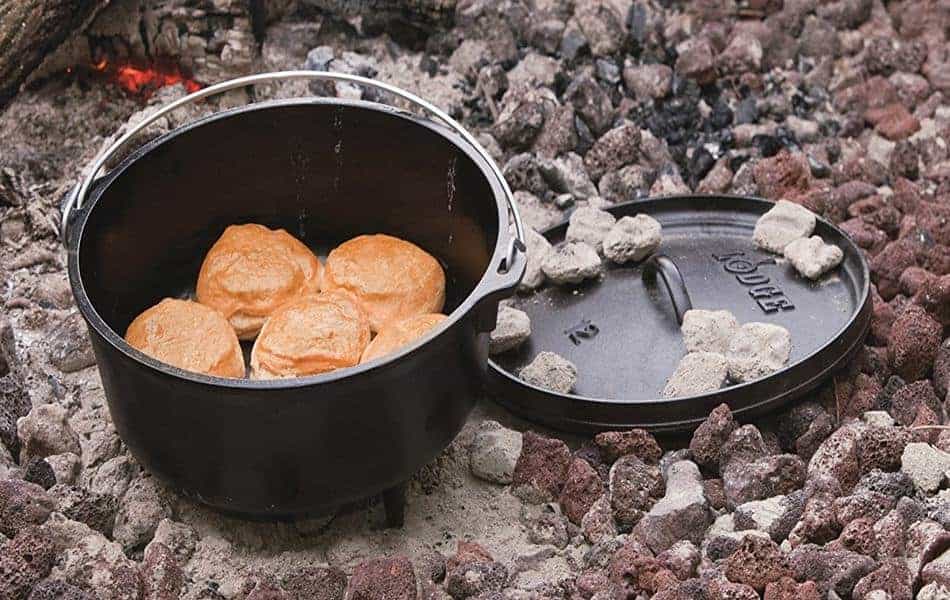
Let’s face it when we are in the great outdoors, packaged, dehydrated, and processed food that hardly looks like food is not satisfying. We get hungry with all that fresh air and exercise.
Now, what if you were able to dish up old-fashioned hearty cooked meals that are made with fresh produce? Filling? Yesss!
Dutch ovens have been around for hundreds of years. You can cook anything your heart desires. Types of cooking include frying, stewing, boiling, baking, and roasting. All meals are breakfast, lunch, dinner, and dessert, and let’s not forget those snacks. Oooh, fresh popcorn…
This post may contain affiliate links. Please read our disclaimer.
If you have landed on this page by accident and just want to purchase a camping Dutch oven check out the range at Amazon.
Benefits of Dutch Oven Cooking
Healthy cooking is the top benefit for us. Because no additional fats are needed when cooking in a cast-iron Dutch oven because they are already seasoned.
As you continue to use the Dutch oven, the seasoning builds up over time and, in turn, enhances the flavors of your future meal preparations.
One of my favorite things is the heat source that a cast iron pot can be used on, for example, a camp stove, open flame, stove top, and even kitchen ovens.
Another benefit that is often forgotten is that this piece of cookware can prepare large meals in one pot.
So camping with family and friends is great because the prepared meal stays warm until you are ready to serve. And the kicker is that you can serve straight from the Dutch. No extra serving bowls are required.
Let’s not forget about the all-important lid that can cook bacon and eggs or scones while you are using the pot for the main meal preparation.
One more benefit, what about the fun of involving everyone in preparing meals, eating, and cleaning up? There is no Wi-Fi or television in the great outdoors, so there is plenty of time to get everyone involved.

How to use a Dutch Oven While Camping
Seasoning
This is the most important tip to remember – maintaining the seasoning on your cast iron Dutch oven.
To ensure that there is a barrier between the cast iron and your food, seasoning needs to take place before and after using the oven.
You also must ensure that you cover all surfaces inside and out, including the lid, with seasoning.
Seasoning with the oil of your choice also stops your cast iron Dutch oven from rusting. It is also the only way to stop your food from sticking.
If your food sticks while cooking, you must re-season your cast iron Dutch oven. Even though cast iron has a natural non-stick surface that builds up with use, sticking tells you the seasoning has broken down.
Keeping your Dutch oven well-seasoned stops the laborious task of removing rust from a cast-iron surface.
Must read if your cast iron seasoning is sticky, you will learn how to fix this tacky problem.
How to Cook with a Dutch Oven Outdoors
There are many ways to use a Dutch oven on a campfire. In some cases, it can involve making do with what is available.
The two ways we will discuss today are the traditional method with the Dutch oven in the hot coals. The second way involves using a Tripod to hang the Dutch oven over the hot coals.
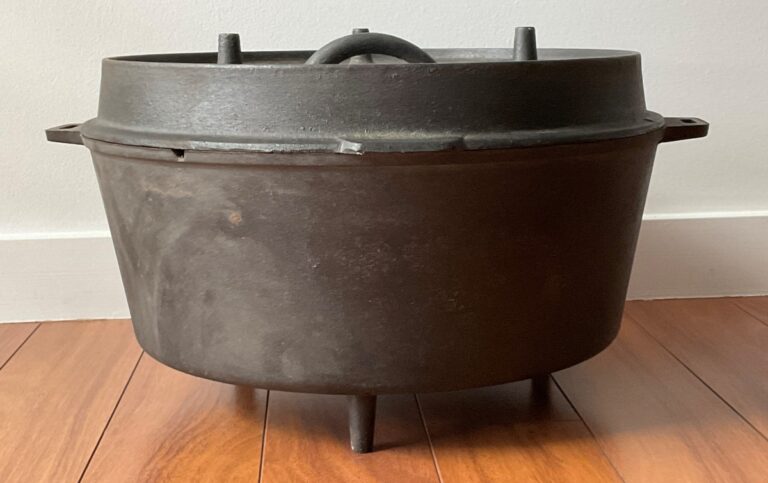
When using a Dutch oven in the coals of a campfire, the best choice is a traditional campfire Dutch oven with legs and a flat bottom. The legs keep the Dutch oven stable while on the coals.
The casting should be the same thickness all over the oven. If there are too many variances in thickness, it will cause hot and cold areas while cooking.
Your Dutch oven should have a loop handle attached securely to the center of the lid. The wire handle (bail) on the Dutch oven should be solid and movable, so carrying the oven when laden will not be an issue.

Lodge 10 Quart Pre-Seasoned Cast Iron Camp Dutch Oven
Buy Now →(Affiliate)
Optimum Heat Retention Tips
For best results, before setting up your campfire, ensure the area is dry and not damp. The damp ground will affect the efficiency of your coals or briquettes.
If possible, use something under the campfire, such as a wire grate or even an aluminum tray, so the briquettes do not touch the moist ground.
Some people do not worry about removing excess ashes in an existing campfire, believing there may be heat-retaining properties to have the extra ash.
The ashes work much the same way as damp ground, and the efficiency of the briquettes is reduced.
So before starting a new campfire, brush the residual ashes away with a whisk broom. If the coals build up during the cooking process, remove the coals and Dutch oven to one side. Then whisk excess ashes away and return to coals for even and efficient cooking.
Recommended Reading – my article teaches you all you need to know about Dutch ovens, their temperature requirements, coal, and briquette placement.
Dutch Oven Cooking with Charcoal
The best temperature for Dutch oven cooking on coals or briquettes is 350 degrees. About 10 degrees of heat is expelled per briquette.
To ensure that an even temperature for cooking is achieved, you must use coals or briquettes that are the same size. This also prevents food from burning at the bottom of the oven. If the food on the bottom burns, sometimes the food at the top of the oven has not been properly cooked.
Briquettes are even in size and generally burn longer and more evenly than traditional coals. If briquettes are unavailable, providing you can get coals similar in size and spacing, you should achieve even cooking.
After all, this was the traditional way of outdoor Dutch oven cooking.
To ensure even cooking, it is recommended that you use two coals per inch. This means for a 12-inch oven, you would use twenty-four coals.
The coals should be laid out like this for a 12-inch oven, 10 coals under the oven, and 14 coals on the lid. The coals should be placed evenly around the circumference of the oven underneath an inch apart.
Do not place coals in the middle of the Dutch oven, as it will cause hot spots, and your food will burn in places. The coals, if laid out as above, will maintain a consistent temperature for up to two hours.
If higher temperatures are needed, add coals two at a time. One is placed on the lid and one under the Dutch oven. This allows the oven to heat up by a further 50 degrees.
If you require your oven to get up to 450 degrees, all you need to add is two on top and two underneath after the original coals were laid.
Dutch Oven Charcoal Tips and Tricks

Quick Reference Guide for Briquette Positioning
Below is a reference guide for baking, roasting, stewing, simmering, and finally frying and boiling over briquettes or firewood.
Baking
More heat from the top so the bottom doesn’t burn
3/4 coals on top; 1/4 underneath
Roasting
The heat comes from both the top and bottom
1/2 coals on top; 1/2 coals underneath
Stewing and Simmering
Most heat from the bottom
1/4 coals on top; 3/4 coals underneath
Frying and Boiling
All the coals underneath
Rotating the oven every ten minutes will stop food from burning and assist in stopping heat spots.
To do this, just turn the Dutch oven about 1/3 of the way around. So, using your leather gloves, lift it, twist it, and place a leg where the previous leg was positioned.
The same method for the lid, twisting the lid in the opposite direction if you have coals on top of the lid.
DOWNLOAD – Camp Dutch Oven Temperature Chart
What Can You Cook in a Dutch Oven While Camping
You might ask what you can cook while camping.
Well, you can cook anything that you would typically do at home.
Here are some suggestions for outdoor Dutch oven recipes…
Oats, bacon, eggs, tomatoes, biscuits, or scones on an inverted Dutch oven lid for breakfast.
Bake some bread before lunch. Then prepare some hearty soup to go with it.
At dinnertime, well, the possibilities are endless. Here are a couple of ideas.
Pot Roast, pizza, lasagna, stews, chili, beans, porcupine meatballs with pasta, healthy Frittata.
Do not forget dessert cobblers, apple pie, or brownies…..
Dutch Oven Accessories
There is no getting around it Dutch oven food preparation does require a couple of specialized accessories. Mainly designed around safety.
Tripod Cooking Over an Open Fire
You must purchase the correct tripod for the size of your Dutch oven, taking into account the weight of the food it will hold.
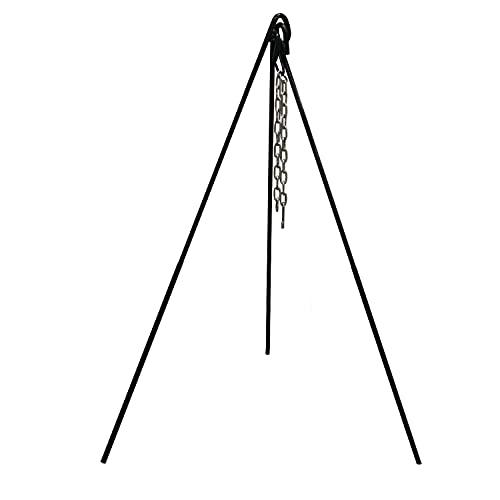
Stansport Heavy-Duty Steel Cooking Tripod
Buy Now →(Affiliate)
A tripod for the campfire is made up of 3 support legs, which are connected at the top. A hanging chain and all materials need to be of superior quality.
Features to Look for in a Tripod
Sturdy metal legs all in one piece and at least 3/8′ steel thick. Legs not in one piece are weak and should be avoided because they are dangerous.
The links connecting the legs and the hanging chain at the top must be of good quality and very sturdy.
The metal pothook on the hanging chain that holds your Dutch oven in place should be made of at least 3/16″ metal.
To avoid any tripod movement when setting it up, ensure that the legs are planted evenly on the ground. Even buried a little in the dirt. Do not allow the legs to balance anything on the ground, for example, tree roots or rocks.
To be safe, set up your tripod, including hanging the Dutch oven off it to test out the strength and security of the setup before starting any campfire.
When using a campfire tripod, the main thing to remember is that you have control over the heat the Dutch oven is receiving.
By lifting the oven away from the flames or coals using the chains attached to the top of the tripod, you have control of the heat inside the Dutch oven.
This assists with not burning your food or making it stick on the bottom of the oven because of the open flames heating it up too much.
So to heat the oven, hang it low, then when hot enough, you can raise it to simmer for as long as your recipe requires.
Tripods are especially good for reheating food because you can heat the oven up slowly, well away from direct flames.
If you require your oven to be quite hot, remember to stir the contents regularly.
As with all cast iron cooking, it is imperative to remember safety first. The Dutch oven, as well as the tripod, will be very hot. Add to this the extremely hot food contained within the Dutch oven you must use all the necessary tools and common sense to remain safe.
Camp Cooking Table
A camp cooking table is not a necessity but nice and convenient to have.
The one below:-
- totally folds down for travel (cover available)
- holds 2 Dutch ovens
- high, wide, detachable screen
- folding legs have adjustable leveling feet
- durable steel and a handy black finish that withstands high temperatures

Lodge Steel Collapsible Outdoor Cooking Table
Buy Now →(Affiliate)
Utensils and Tools For Dutch Oven Campfire Cooking
Some of my favorites are listed below – click the links below and see them at Amazon for yourself…
Wooden Utensils – as long as possible to protect your skin as well as protect the seasoning on your Dutch oven.
Loose-fitting leather gloves that cover your wrist get hot, and loose-fitting ones can be removed quickly. Tight-fitting gloves will melt into your skin.
Lid Lifter to remove the hot lid safely – always follow instructions when using this tool. Lid holder – a wire rack of clean brick or rock.
Campfire Tripod – the Dutch oven hangs on this tripod, and the heat from the fire below heats the oven. It is extremely important to buy a tripod that will hold the weight of the Dutch oven filled with food while hanging.
Tongs – the longer the handle, the better. You can use these not only for turning the food but also for adding or removing coals.
Dutch Oven Lid Stand – this is used to have a clean place to put the lid. It is also used to heat the lid before frying. The stand can be surrounded by coals, and the lid is used as a griddle.
Lodge Camp Dutch Oven Tool – this is one tool that combines several functions. A lid lifter, a bail lifter, a trivet, and a cook stand.
Small hand shovel for moving coals from the fire, digging a cockpit, and, very importantly, burying extinguished charcoal.
Lastly, use a whisk broom to brush ashes and dirt off your Dutch oven.
Recommended Reading
How to use a Lodge 4-in1 Camp Dutch Oven Tool Video

How to Clean a Dutch Oven While Camping
How to clean a Dutch oven after cooking? Using a wooden spoon (this protects the seasoning), remove all the food from the oven. If burnt food is on the bottom of the Dutch oven, gently scrape it away with a wooden spoon.
The oven then needs to cool down before adding any water. Otherwise, the water could crack the metal if the oven is hot.
Add a couple of inches of water, replace the lid, and bring your oven to a boil. As the oven heats, the excess food will break away from the inside of the Dutch oven. This happens because it has been seasoned.
Then, remove it from the heat and let the oven cool. When cool, empty of dirty water and rinse with warm water. Hopefully, if the oven is seasoned correctly, it will be clean. If not, just repeat the process.
Dry excess water from the oven. You should place it over the fire with the lid not fully on. It will dry, and excess moisture will be removed from the pores of the cast iron.
Lastly, using a paper towel, wipe your oil of choice over the Dutch oven inside and out. Use another clean paper towel to wipe off any excess oil.
How to store your Dutch oven after cleaning is also essential. While camping, store the cast iron in a clean, dry place ready for your next campfire feast. More storage tips can be found in my article.
What is the Best Dutch Oven for Camping?
My top 3 picks are:-
1. The Lodge Double Dutch Oven – primarily because the lid doubles as a skillet and can be used on the campfire stand-alone. Or it can be inverted over the Dutch oven to prepare biscuits or other dishes while cooking inside the oven.
2. Lodge L8DO3 Cast Iron Dutch oven – flat bottomed coil bail, convenient size 5-quart and easy to use.
3. Lodge 6-Quart L12CO3 Cast Iron Camp Dutch Oven – camp Dutch oven with legs – nice 6-quart size, Flat lid for further convenient skillet use, and a quality oven.
There is also information about Aluminum versions of Dutch ovens for those who may need a Dutch oven that is a lot lighter than the traditional cast-iron Dutch oven. You will also find my Top 3 Best Cast Iron Dutch Ovens for camping.
If you have not yet purchased a Dutch oven or are looking to update to a new oven go check out my article about Dutch ovens for camping. In that article, you will find extensive information about Dutch ovens for camping.
FAQs
Here are the answers to some common questions about Dutch ovens.
Can you use a camp Dutch oven indoors?
There are two types of camp Dutch ovens. A seasoned cast-iron oven with a flat bottom and a seasoned cast-iron oven with legs.
Both can be used indoors. The flat-bottomed one can be used on all indoor cooking surfaces with care. There is no scraping, just clean lifting to avoid damaging any cooktops.
The seasoned camp Dutch oven with legs could be used on a gas cooktop with care. It could also be placed inside a conventional oven.
Disclosure – extreme care should be used when using a Dutch oven with legs as you need to be able to lift the lid and move the oven around the kitchen with care.
Can you put a Dutch oven on a fire?
Yes, you can put a Dutch oven on fire. Read the caveats below.
Outdoor Campfires or Briquettes
You can use a seasoned cast-iron Dutch oven with a flat bottom or a seasoned camp Dutch oven with legs.
Indoors Gas Cooktop
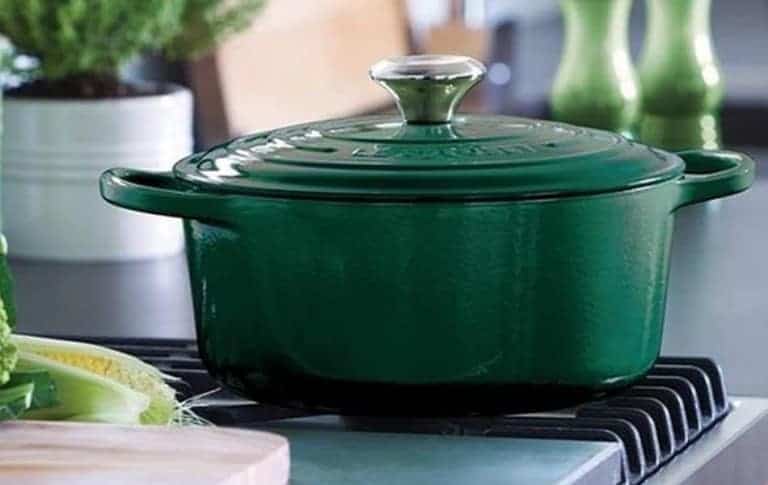
You can use an enamel cast-iron Dutch oven on a gas cooktop. You can also use a seasoned cast-iron Dutch with a flat bottom or a camp Dutch oven with legs if you use extreme care so you will not damage your cooktop.
What’s a good size Dutch oven?
5-quart to 6-quart Dutch ovens are a great manageable size that caters to standard Dutch oven recipes that feed 4 people comfortably.
If you are one or two, you will have leftovers – as well know, leftovers always taste great – no cooking required
Final Thoughts – How to use a Dutch Oven While Camping
I am very passionate about Dutch ovens, and I hope I have answered all your questions (and a few more) about how to use a Dutch oven while camping.
Check the site out and click through to some of the articles I prepared for you highlighted above.
See an extensive range of Dutch ovens and Dutch oven cooking accessories and tools.
One-Pot Cooking Rocks!
Oh, and P.S. Happy Camping!!

Michelle
Hi, I’m Michelle, the founder, owner, author, and editor of OvenSpot. My passion for one-pot cooking commenced when I was working to prepare cafeteria lunches for school students. I am now on a mission to assist you in choosing the cooking pot or appliance you will use daily. As well as in-depth information to assist you in using and caring for your cookware and appliances.
Questions? Reach out to Michelle at [email protected]
